Download and install the Epson OPOS ADK Configuration Tool
Use the following directions below to download and install the Epson configuration tool. This tool is used to configure your Epson receipt printer and connected cash drawer.
- Click to Download Epson Opos ADK
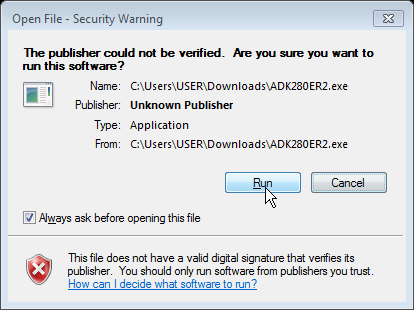
- Run the downloaded application. This will launch a WinZip self-Extractor which has all the files needed for the Epson Utility.
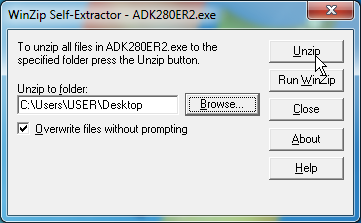
- Unzip the files to a location and close the Self-Extractor application
-
- Locate and open the OPOSADK file folder which was unzipped from the previous step. Go into OPOSADK\ ADK280ER2 \ Disk1 folder.
From here launch the setup application.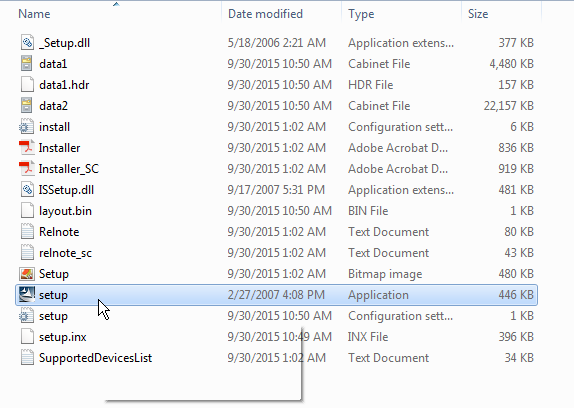
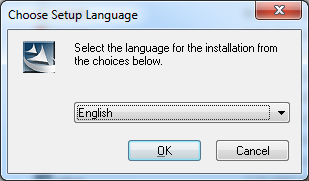
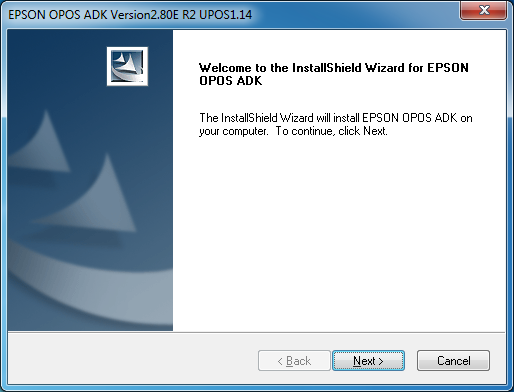
- The install wizard will start up. Select a language for the installation.
- Click Next.
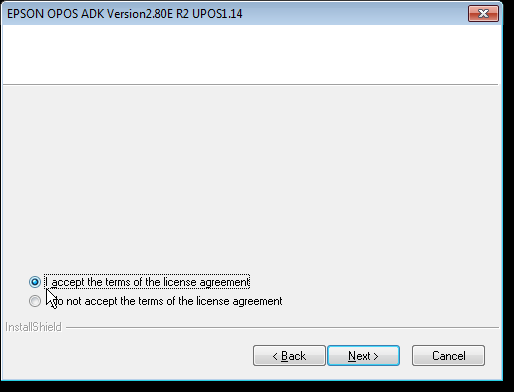
- Accept the terms of the license agreement.
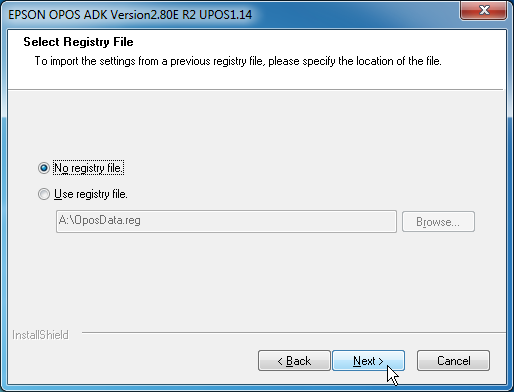
- Select “No registry file”.
- Select the “User” setup type.
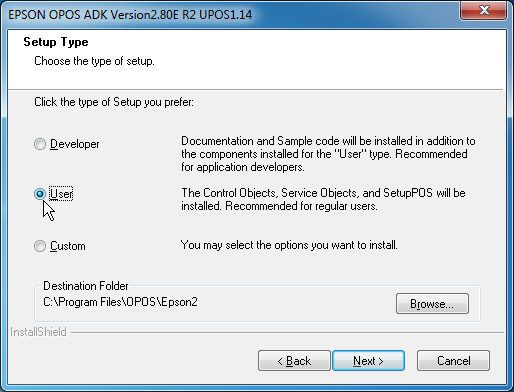
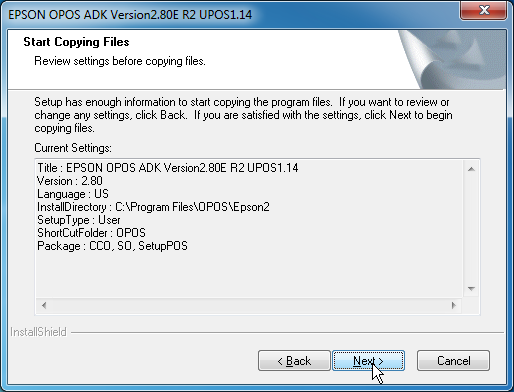
- Click Next.
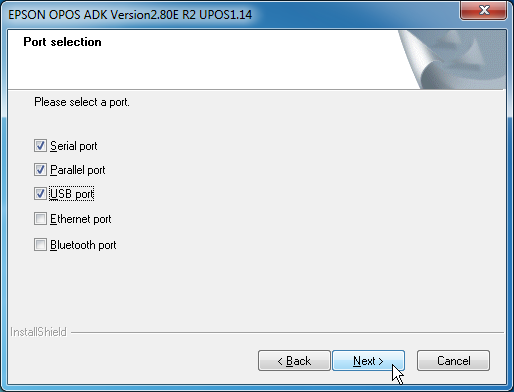
- Select all of the connection types you will be using to connect to Epson printers.
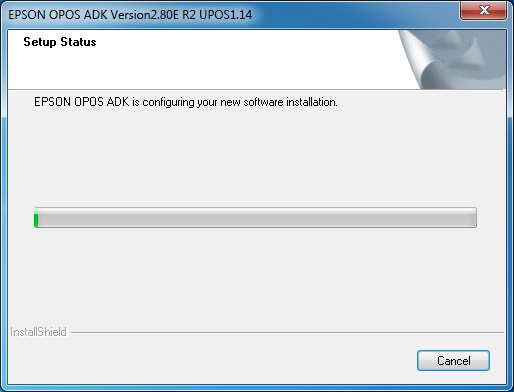
- Wait for the Setup to complete.
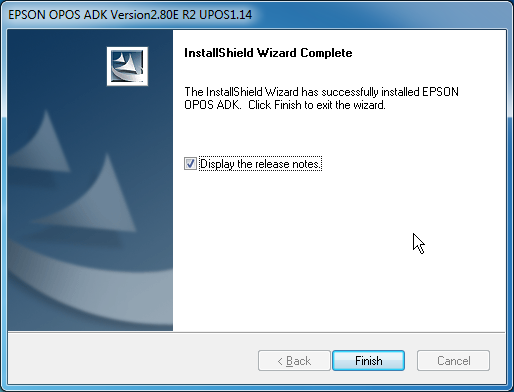
- Close the Install Wizard.
Connection Steps:
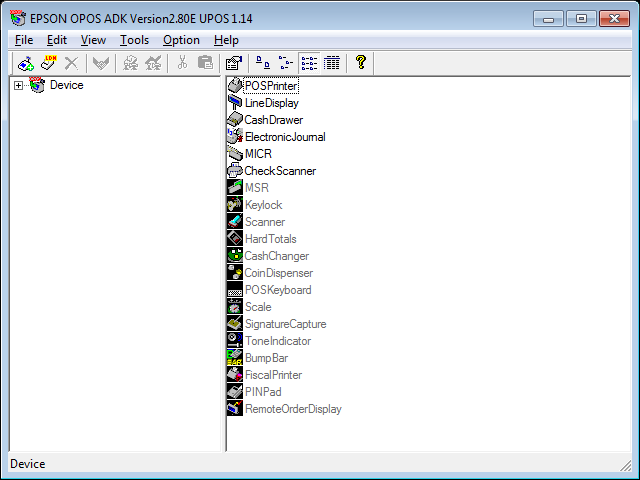
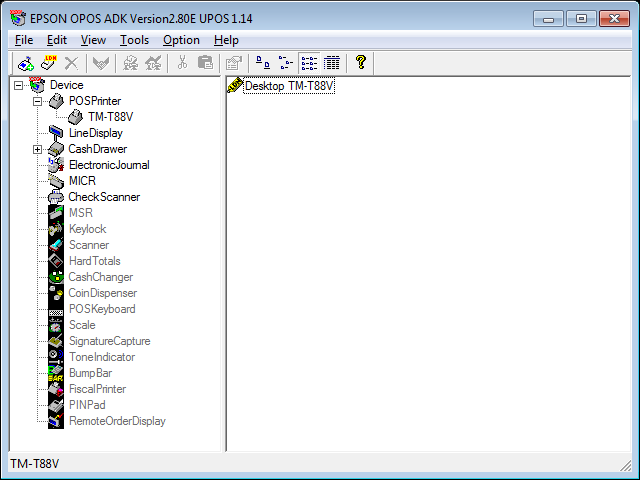
- Open “Epson Opos ADK SetupPOS” with administrator privileges. The following screen will appear.
(To do this right click on the application icon and click “Run as administrator”)
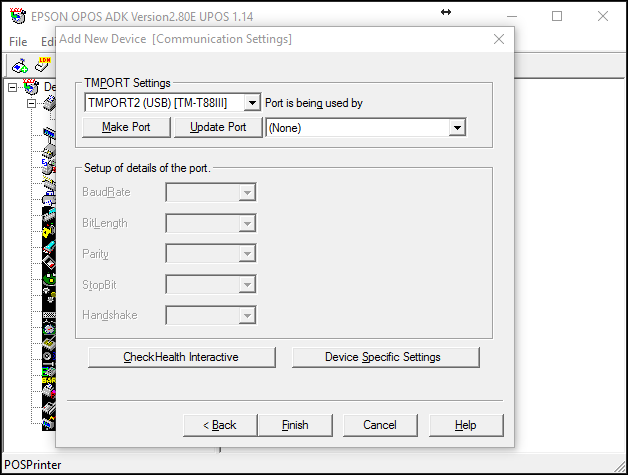
- Right click on POSPrinter, then click on “Add New Device”
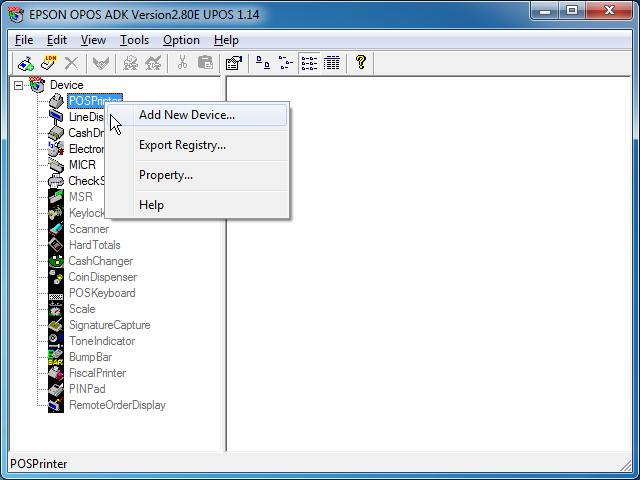
- You will see the following pop up.
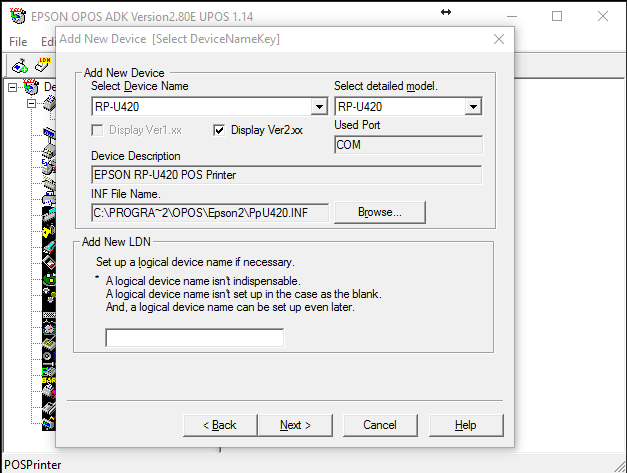
- Select your Device Name for the printer (TM-T20ii).
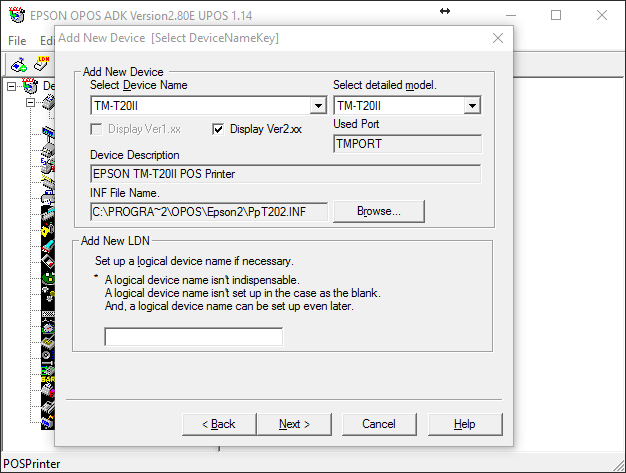
- The printer port will automatically be created for USB connections. Click Finish to complete setup.
Verification Steps:
- Open “Epson Opos ADK SetupPOS” with administrator privileges. (Right click and click “Run as administrator”).
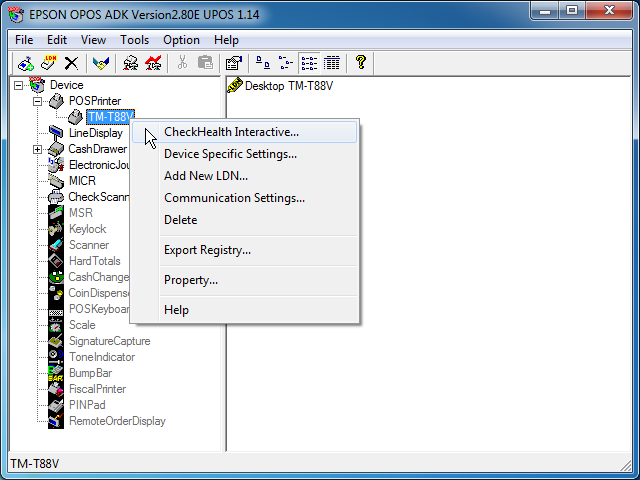
- Right click on the Printer you want to test and click CheckHealth Interactive button
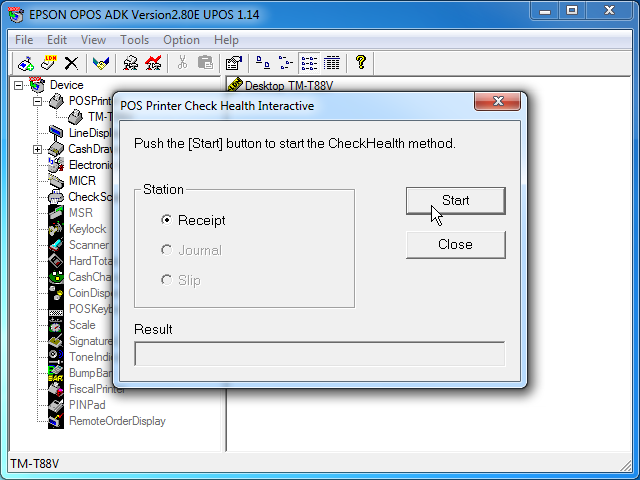
- The following pop up window should appear. If the printer is set up properly, when you click the start button the printer should feed out some paper.
Comments
Please sign in to leave a comment.