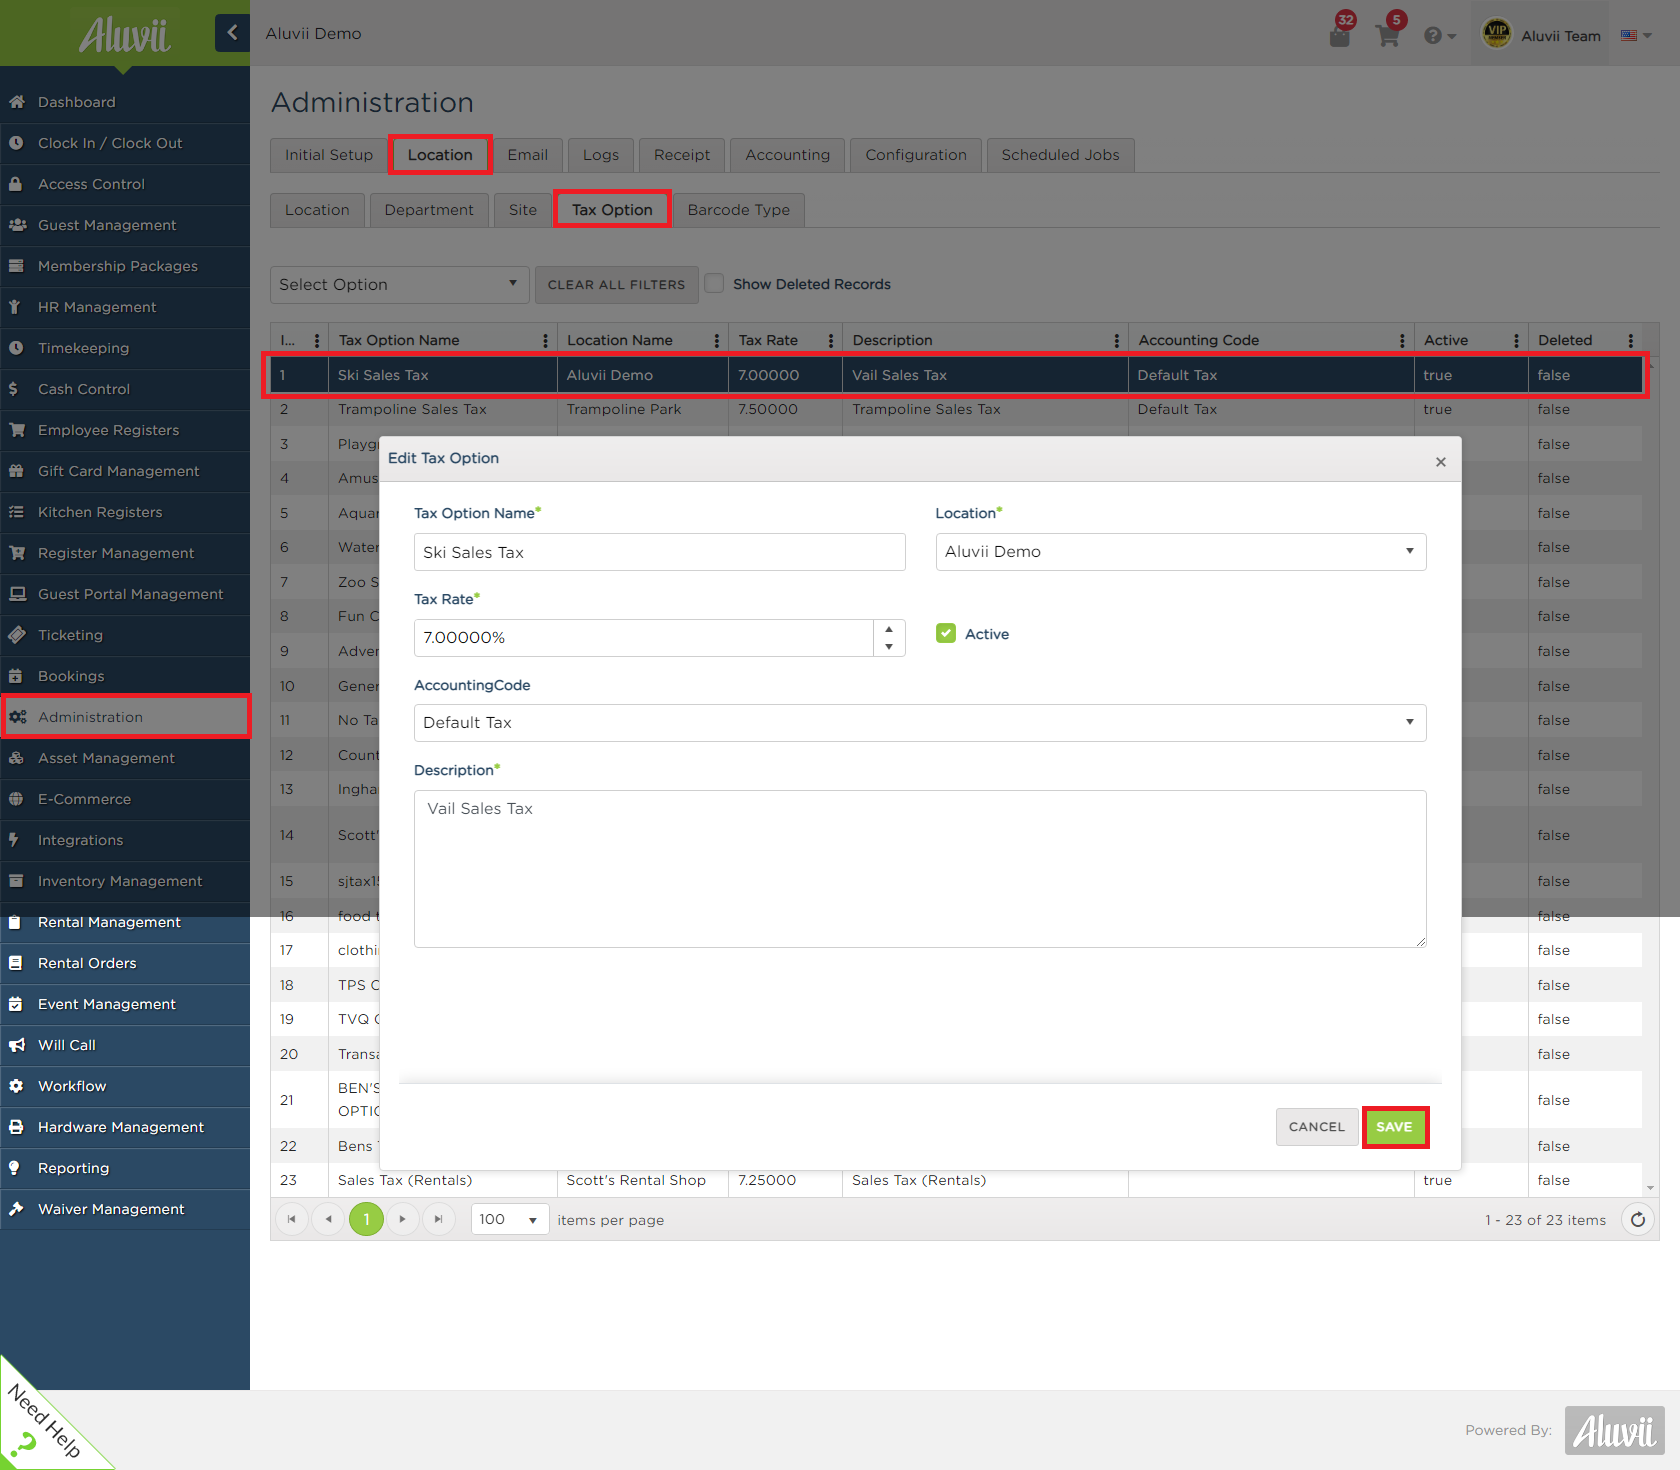
Tax options are found in the Administration module under the Locations primary tab and Tax Options secondary tab as shown in the image below. You can manage more than one location in Aluvii and assign a different tax rate to each location. In the product set-up, a different tax option can be selected for each location where the product will be sold.
Adding a Tax Option
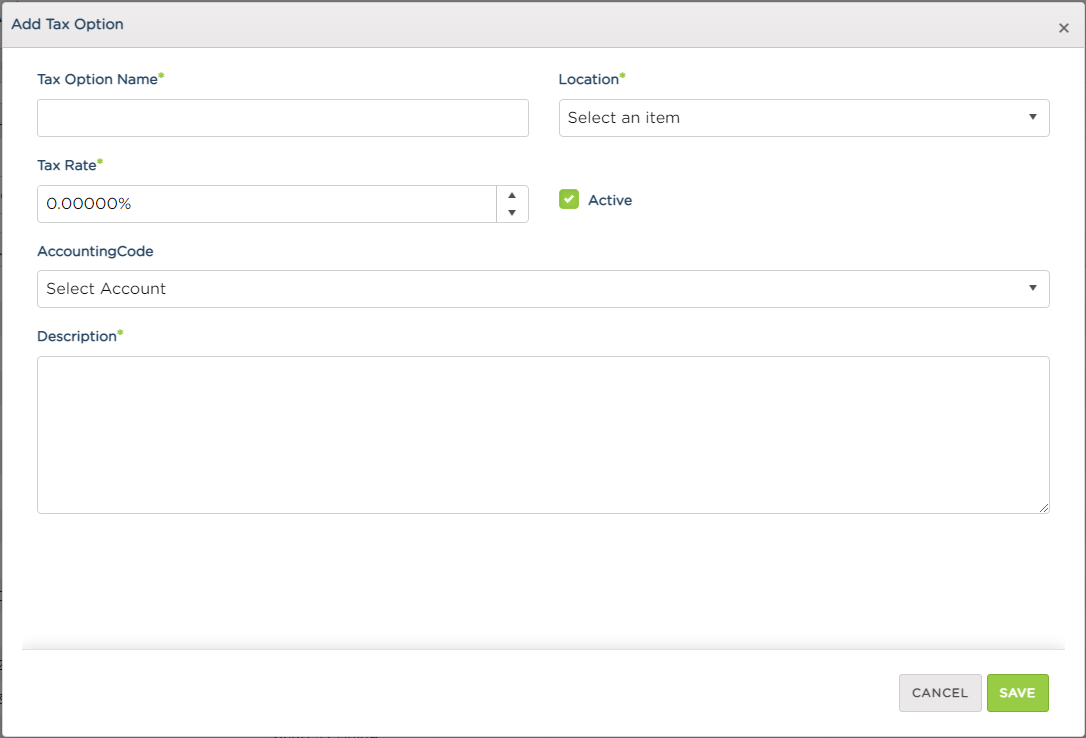
1. To add a tax option, select Add Tax Options.

2. An Add Tax Option form will display. The form has four required fields: Tax Option Name, Location, Tax Rate, and Description. After filling in the required fields, click Add. The form will close and the grid will refresh.
Editing a Tax Option
Click the tax option you want to edit and then select Edit Tax Options from the drop-down. Edit the form and click Save.
Note on Editing Tax Options: Consider whether you should create a new sales tax option instead of editing an existing tab option, especially in cases where the tax rate changes. Reports that display the Tax Option Name or Tax Rate will be change retroactively, so make sure that you want retroactive reports to have the edits you're making. For example, let's say that you have a Tax Option Name called "city sales tax" and it used to be 5%, but the rate was recently changed to 5.3%. Reports that display the tax rate will now show 5.3% instead of 5% (even though the amount actually charged to the customer was 5% and the amount showing as being charged is 5%). To be clear, the amount charged will not change in the reports, but the rate percentage displayed will, which could lead to confusion when reading reports. You'd see that 5% was really charged, but the reader of the report would see that the tax rate is 5.3% and be confused as to why the rate does not match the actual amount charged.
Comments
Article is closed for comments.