Workflows enable set up fields that are commonly used in a variety of instances. In this article, we will discuss how to set up the workflow for rentals.
1. Log in to your Aluvii portal and click on Workflow in the left menu.
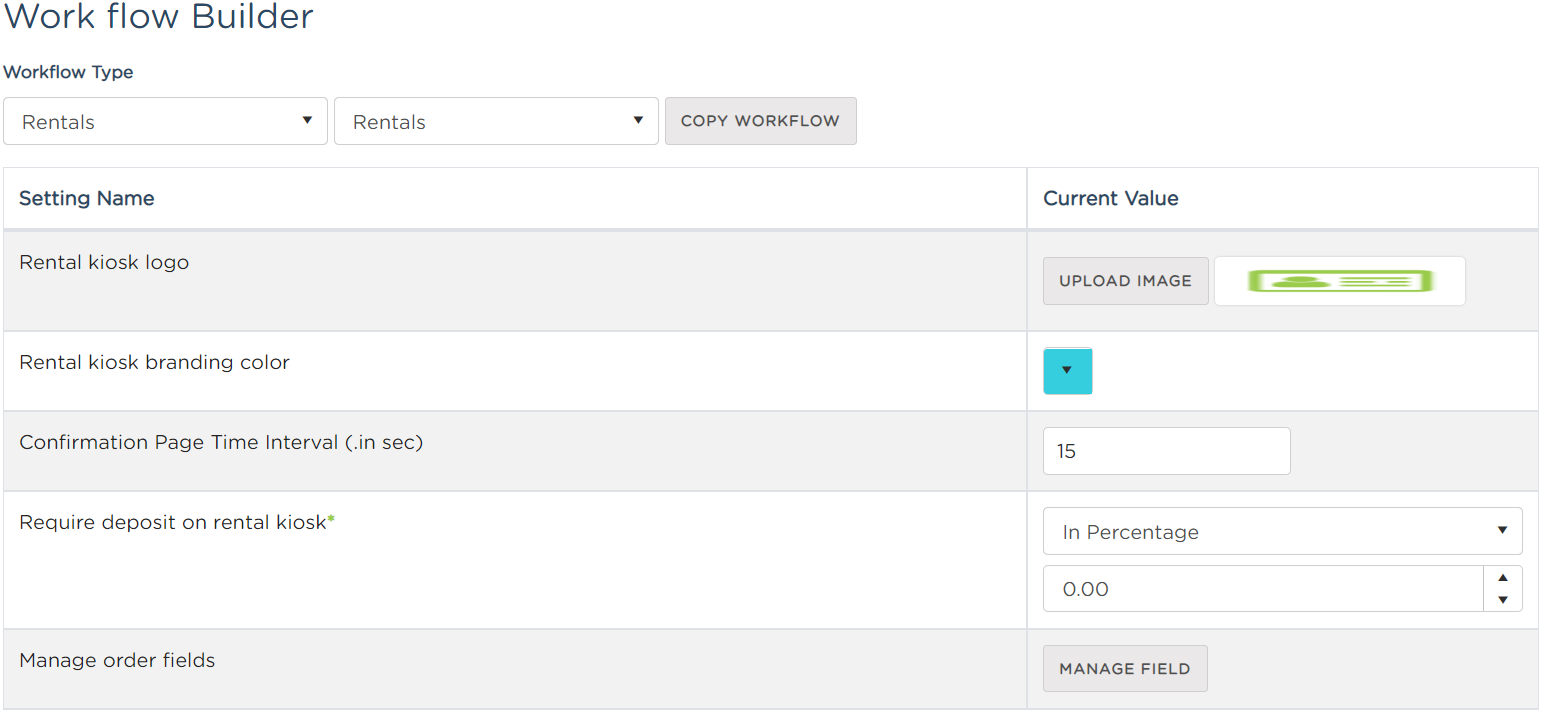
2. In the first dropdown menu, select Rentals. In the second dropdown menu, select the rental you wish to edit. At first, there will only be one rental, but if you use multiple settings for different rentals, you can click on Copy Workflow to create a new one.
3. Fill in all the fields for the rental workflow.
- Rental kiosk logo: the logo of the rental kiosk
- Rental kiosk branding color: the color of the rental kiosk branding
- Confirmation Page Time interval: how long the confirmation page will display before resetting
- Require deposit on rental kiosk: select if the deposit will be as a percentage or a flat rate. If you require no deposit, set this to 0.
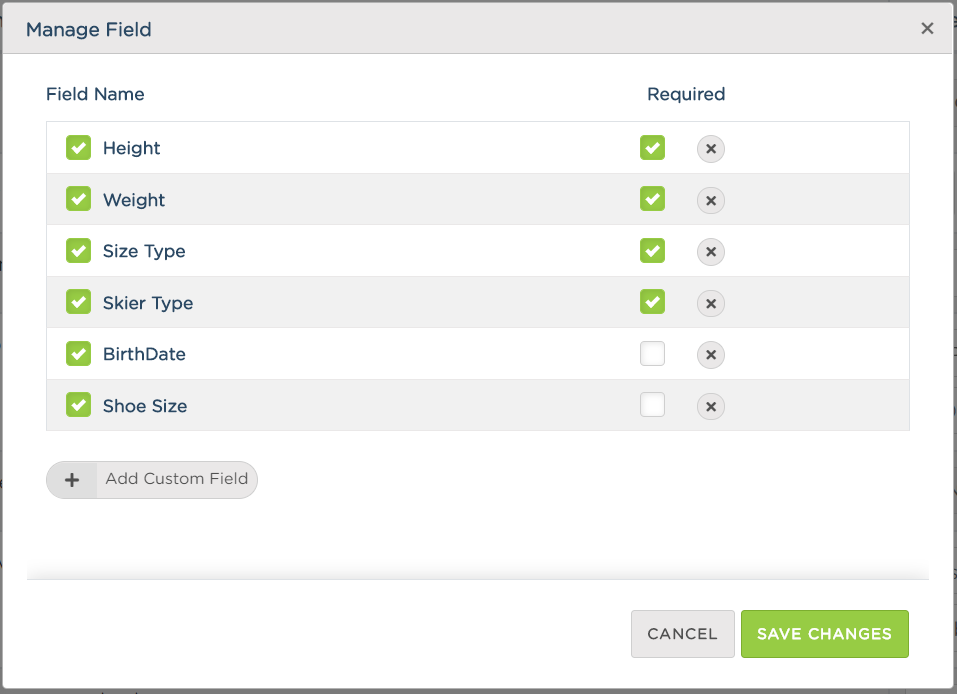
- Manage Order fields: select custom fields by clicking on Manage Field. Add any custom fields you desire, and set whether they are required or not.
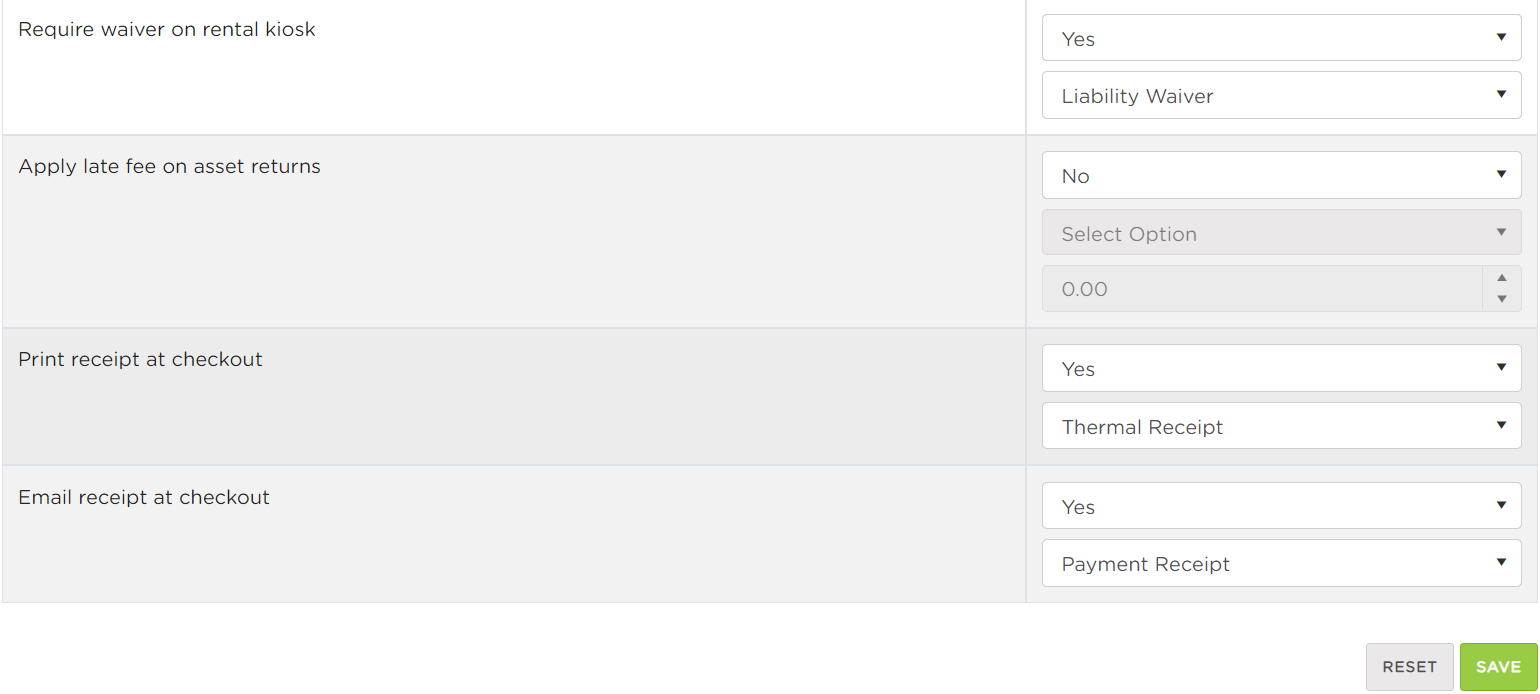
- Require waiver on rental kiosk: if you select Yes, select the waiver you wish them to sign before renting.
- Apply late fee on asset returns: if you select Yes, you can select whether the late fee will be applied to the rental package, or the entire order. If you select the entire order, you will be prompted to set the amount.
- Print receipt at checkout: if you select Yes, you will be prompted to select the type of receipt to be printed.
- Email receipt at checkout: if you select Yes: you will be prompted to select the type of email receipt to be sent.
4. Click on Save.
Comments
Please sign in to leave a comment.