Google Tag Manager Tutorial: Set Up an Account
Setting up a free account is an easy two-step process, but it’s separate from any of your other Google Analytics or Gmail accounts.
Here’s what you do:
1. Go to https://www.google.com/analytics/tag-manager and click the green “Sign Up for Free” button. It will ask you to input your account name (company), country, and website URL, as well as where you want to use Google Tag (web, iOS, android, AMP). When you’re finished, click the blue “Create” button.
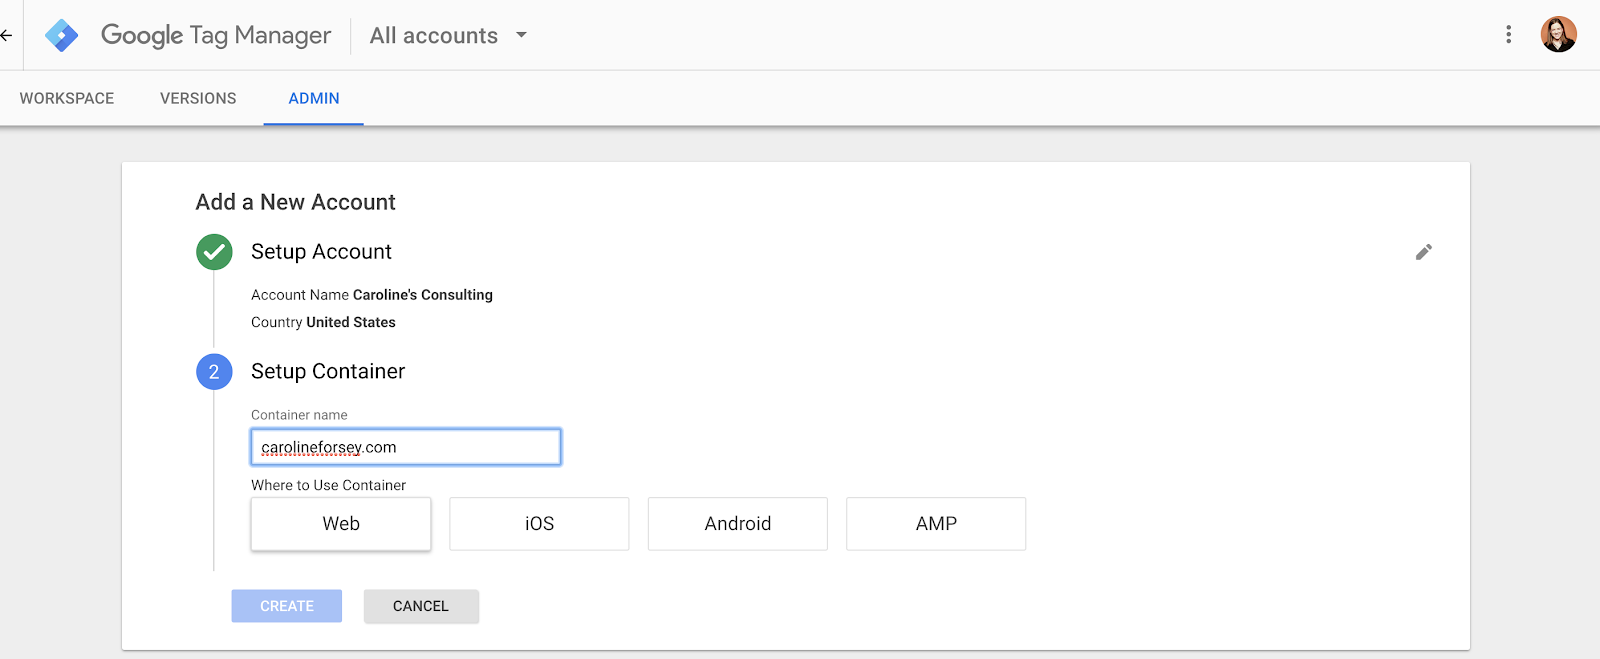
2. Once you have an account, you'll create a new Container. Use the Container ID to paste into the Aluvii webstore and event portal settings. It usually looks like GTM-XXXXXXX.
Google Tag Manager Tutorial: Set Up a Tag
Once you have a Google Tag Manager account, the first thing you’re going to want to learn is how to set up a tag.
You can create unlimited configurations of tags in Google Tag Manager.
This is helpful for creating in-depth reports on your audience’s behavior, but it can become inefficient if you don’t organize your tags properly.
Google recommends using the following naming convention: tag type - name of app - detail.
Perhaps you name one tagging configuration, “AdWords conversions - iOS - 2018-02 campaign” and then another, “Google Analytics - CTA - About Us page”.
This way, you can correctly identify and collect data related to specific campaigns or pages.
For instance, the second tag, “Google Analytics - CTA - About Us page,” tells you how well your About Us call-to-action button is performing. That information is valuable, and might be lost if you named your tags more generally, like, “CTA button”.
Now that we’ve cleared that up, let’s check out how to set up a tag:
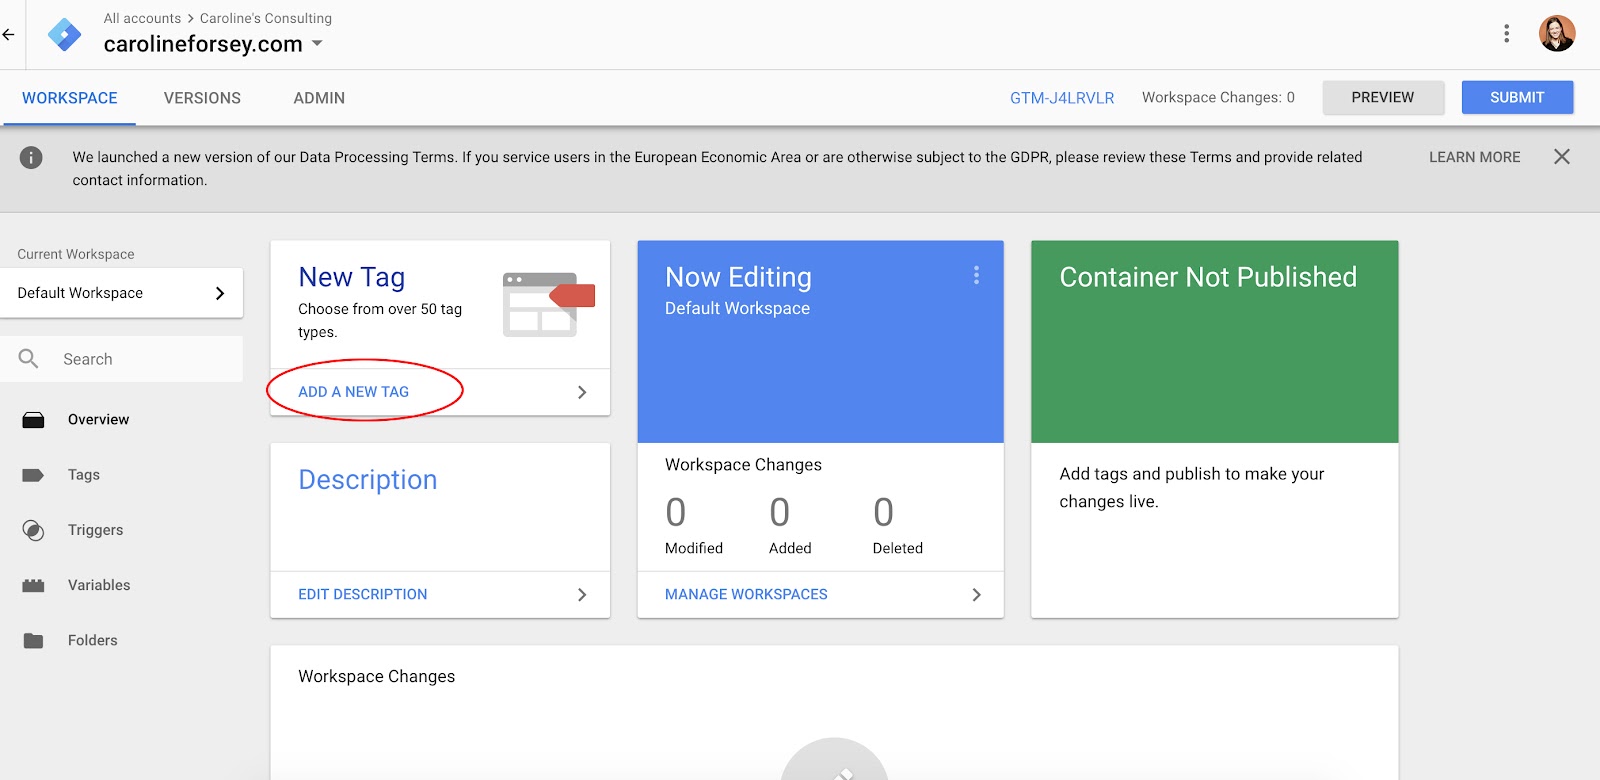
1. Within your Google Tag Manager dashboard, click the “Add a New Tag” button, circled below in red.
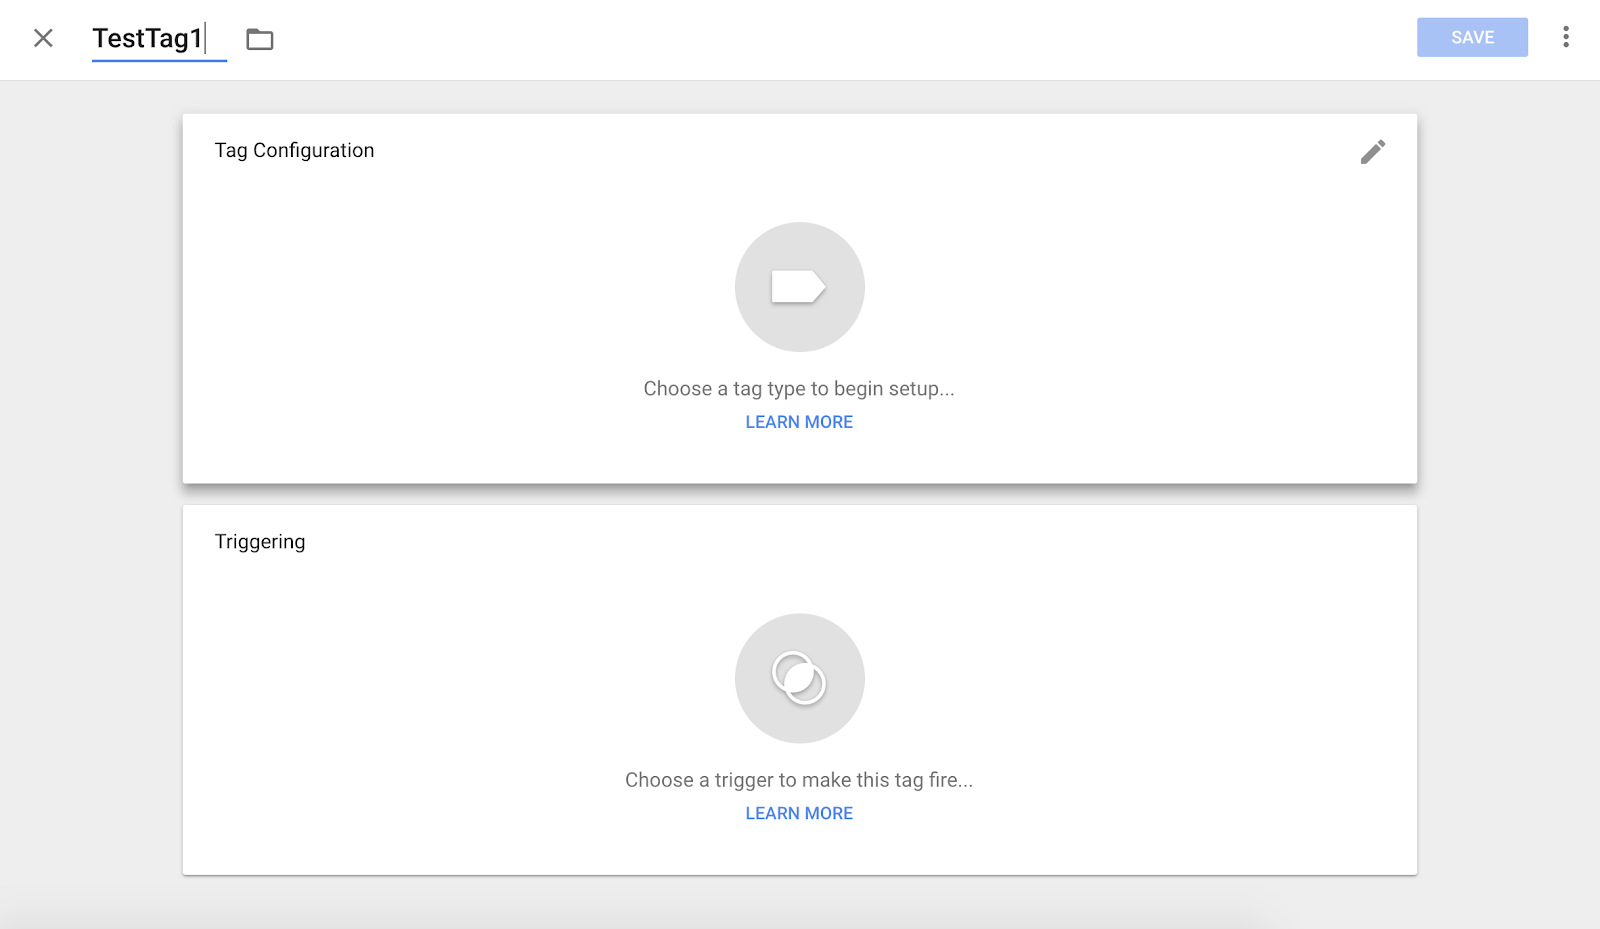
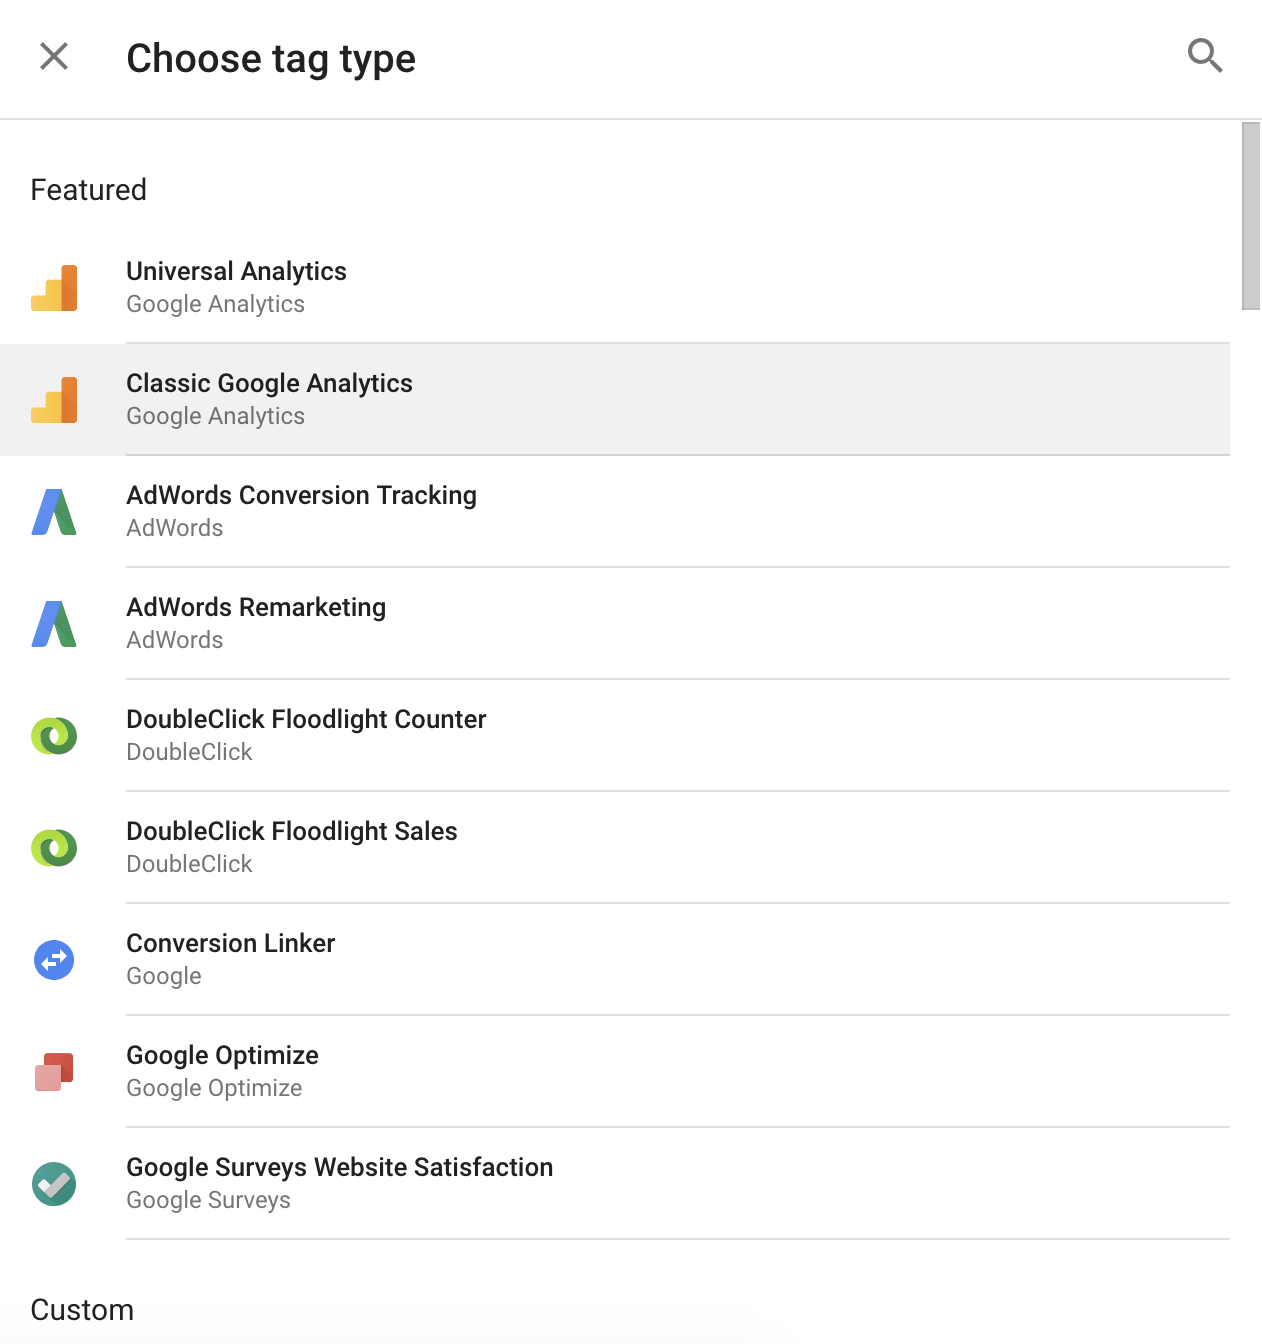
2. Title your tag, and then click anywhere in the top “Tag Configuration” box, to choose a tag type.
3. There are dozens of tag types (they are not all displayed here, and you can also customize a tag type). I chose “Classic Google Analytics”.
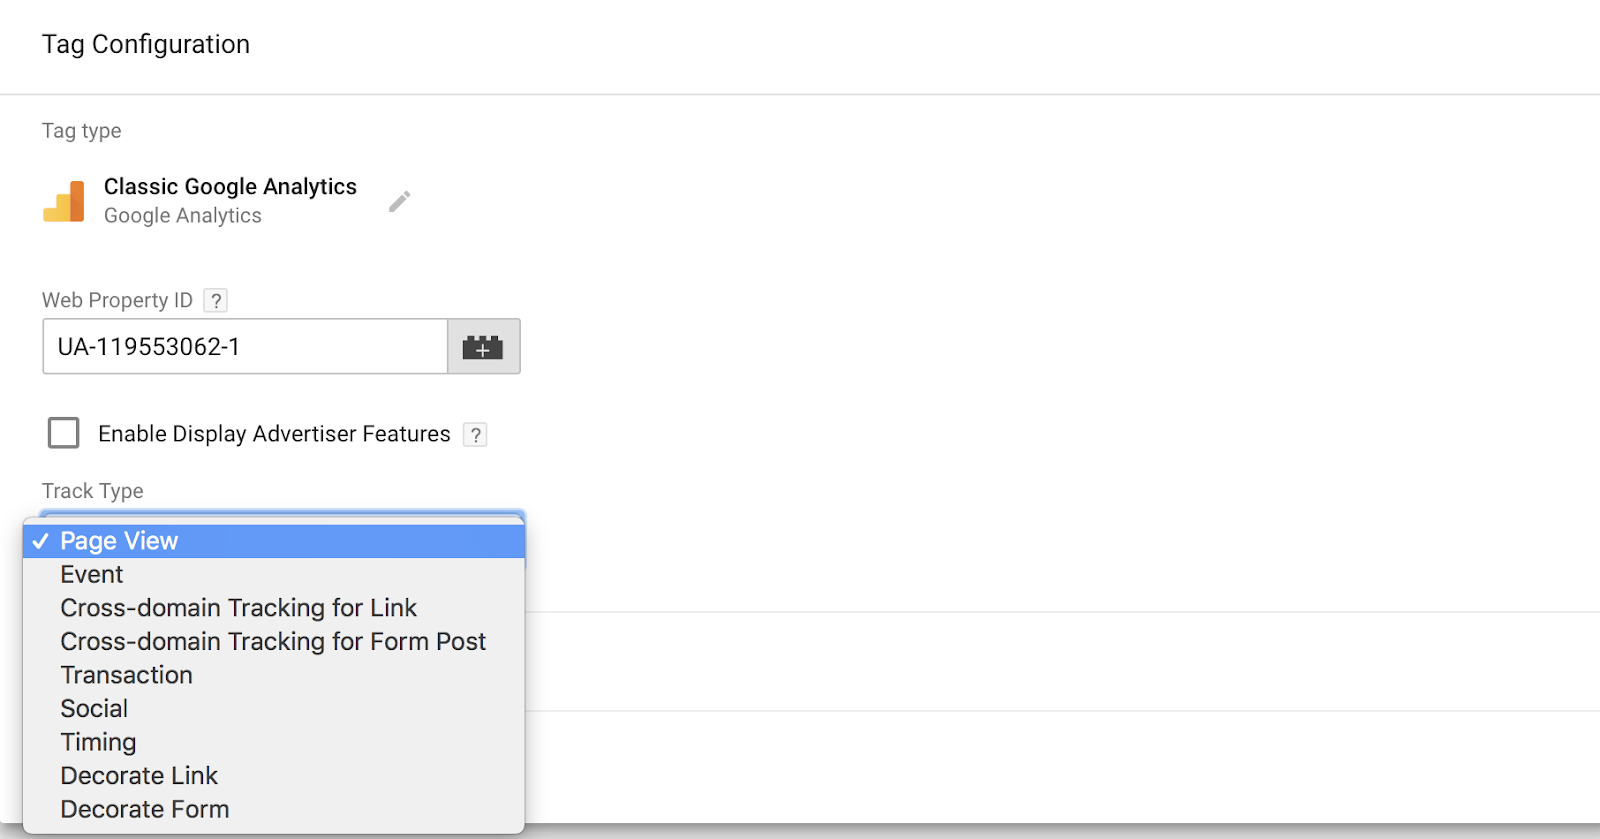
4. If you want your tag tracked in Google Analytics, the next step will be to input your Web Property ID, found in your Google Analytics account. Then, select a “Track Type”. I chose “Page View”, but there are plenty of other options.
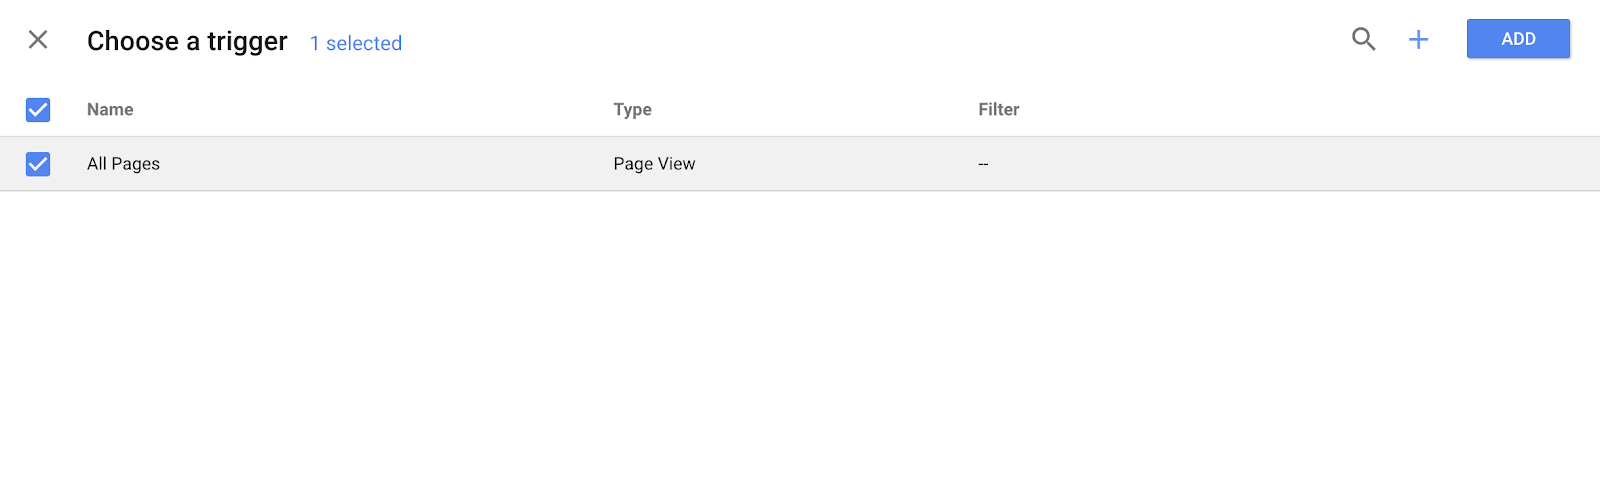
5. Next, choose a trigger (a trigger means when you want the tag recorded, i.e. “every time someone visits the page”). I chose “All Pages”, to get insights every time someone views any of my web pages, but this varies depending on your purposes.
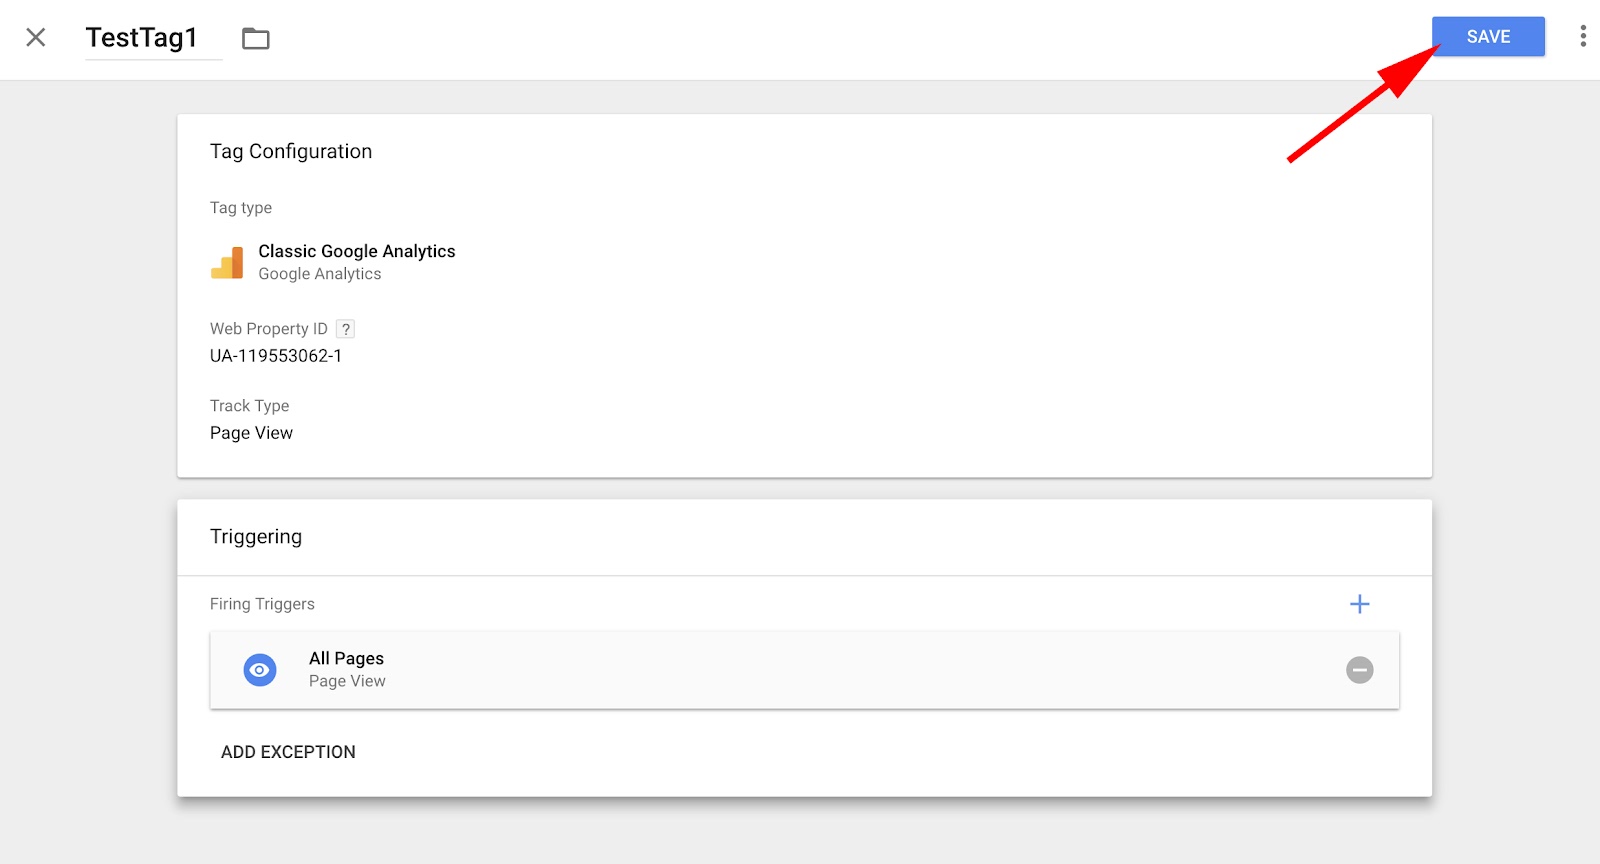
6. When you’re happy with the information in the “Tag Configuration” and “Triggering” boxes, click the blue “Save” button.
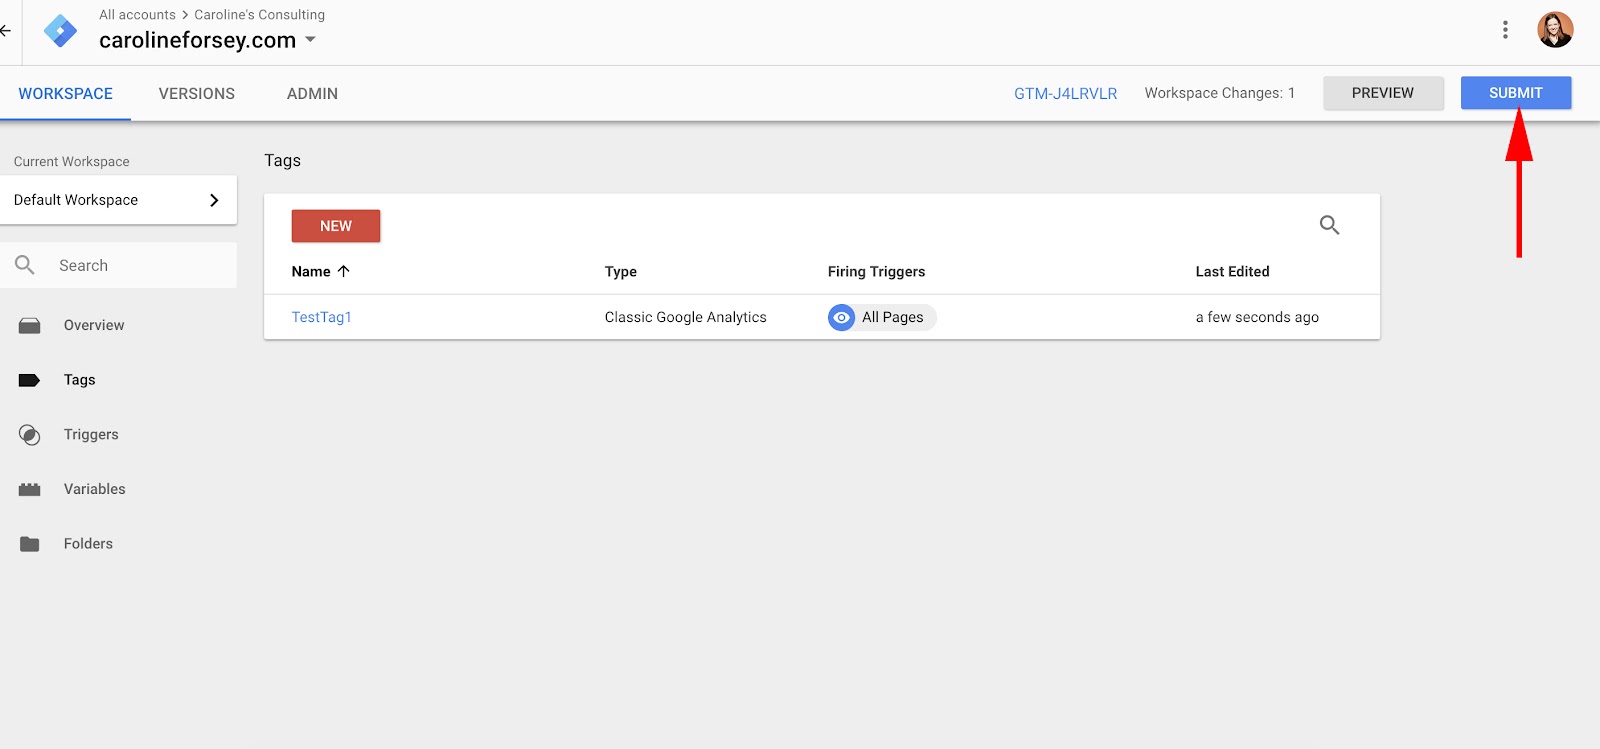
7. Next, click the blue “Submit” button. Your tag won’t work until you do so.
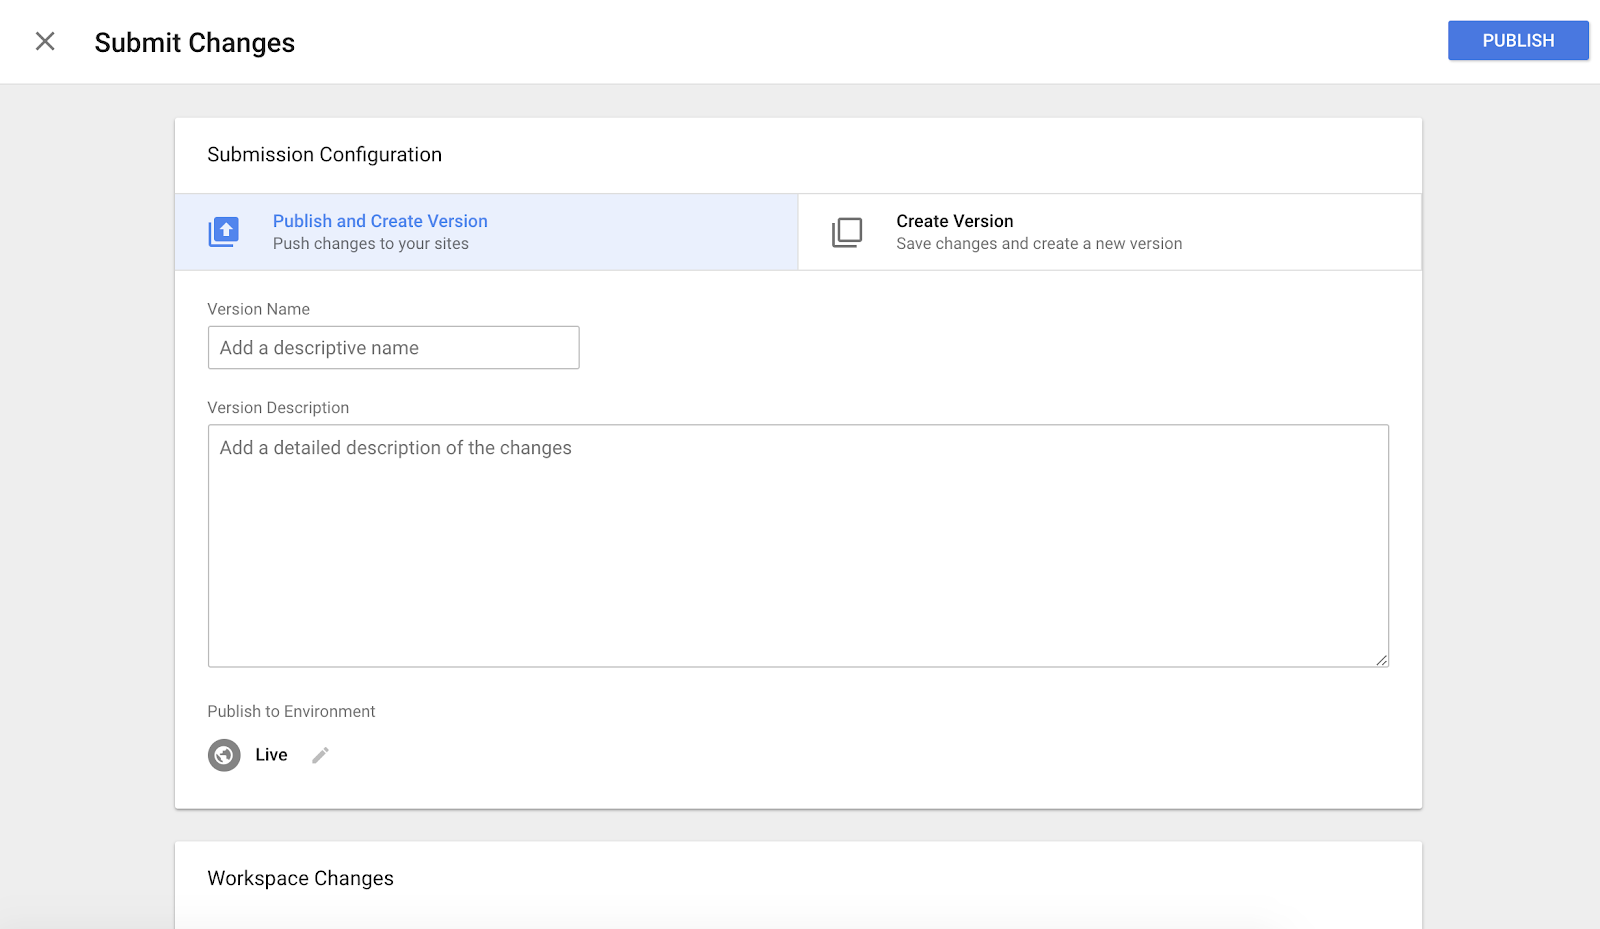
8. When you click “Submit”, you’ll be taken to this “Submission Configuration” page. There are two options: “Publish and Create Version” or “Create Version”. Since I’m ready to push the tag onto all my site pages, I selected “Publish and Create Version”, and then I pressed the blue “Publish” button in the top right.
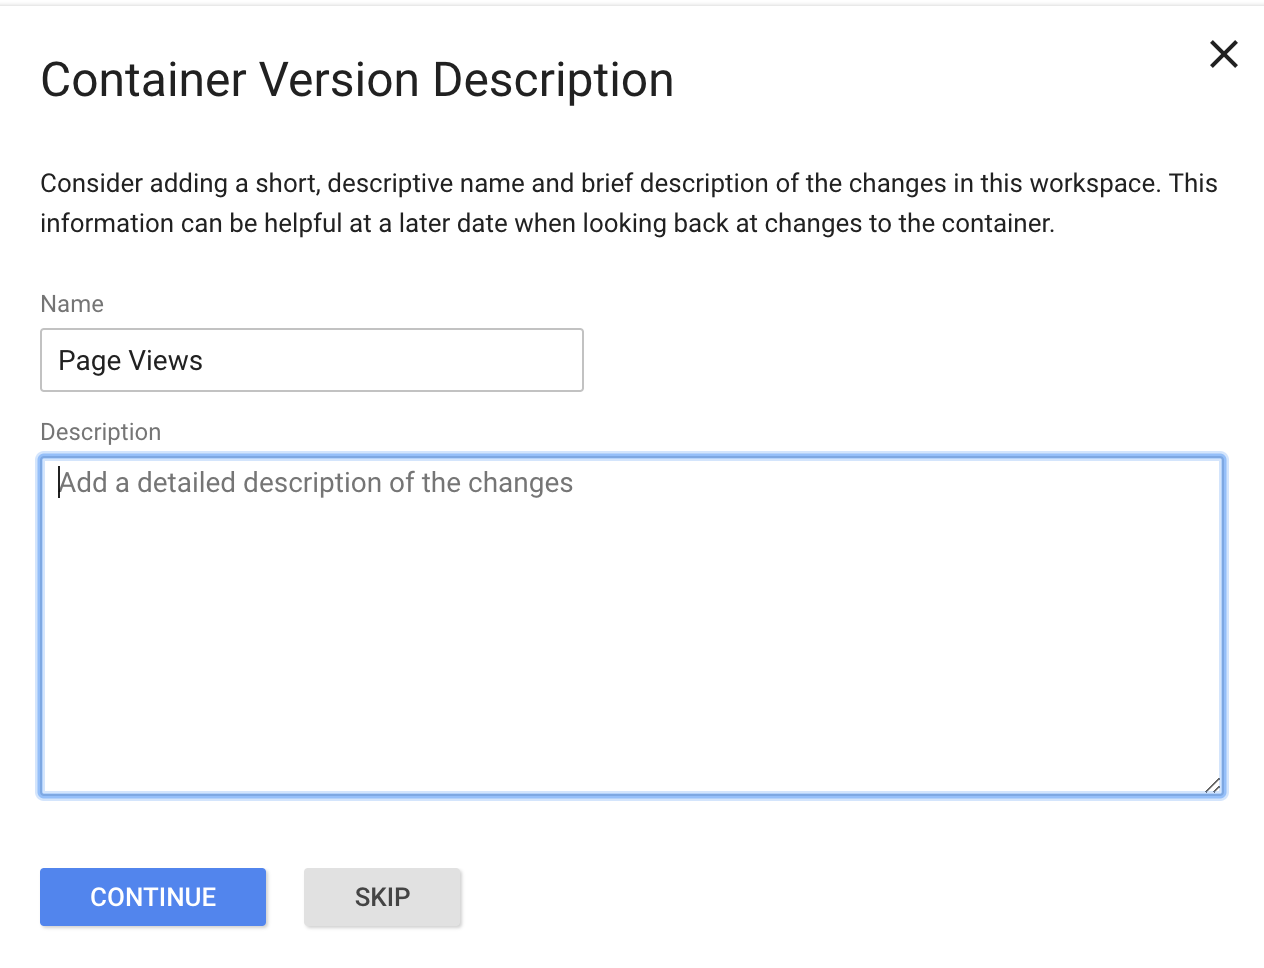
9. Finally, you’ll be shown this “Container Version Description”. To keep your tags organized, add a name and description to understand what you’re trying to record with this tag.
10. Ensure your tag appears in your “Version Summary” report.
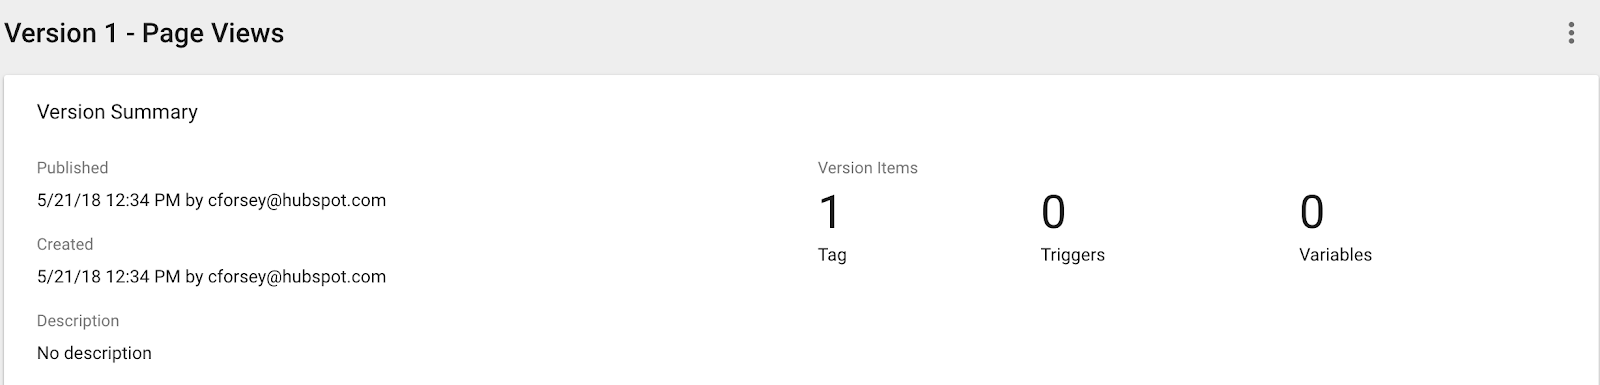
Now, you’ve successfully created your first tag.
Google Tag Manager and Google Analytics
If you want to use Google Tag Manager in conjunction with Google Analytics, there are a couple steps you need to take. However, it’s a worthwhile endeavor -- embedding tags in your site will increase the precision of your Analytics reports.
First off, you’ll need to remove your GA code from your site pages. You’ll only need your Google Tag Manager tag code embedded -- if you use both, it’ll just report everything twice and mess up your data.
Second, you’ll probably want to create a variable for your Google Analytics Tracking ID. A variable is a Google Tag Manager tool meant to increase your efficiency by saving additional (optional) data you provide.
If you save your GA Tracking ID as a variable, you won’t have to look it up every time you create a new tag for Google Analytics (which makes the lazy-person in me very happy).
How to Create a Variable in Google Tag Manager
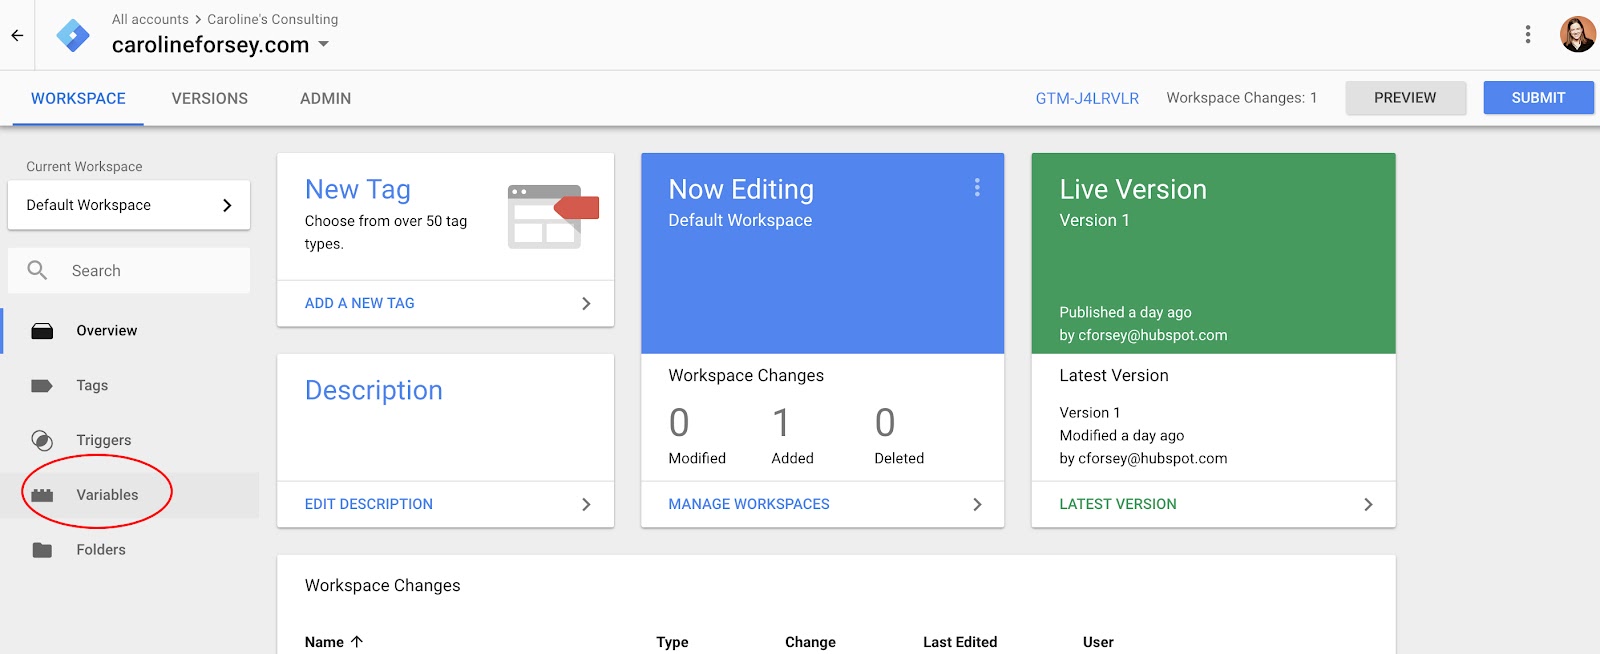
1. Click “Variables” on your Google Tag Manager homepage.
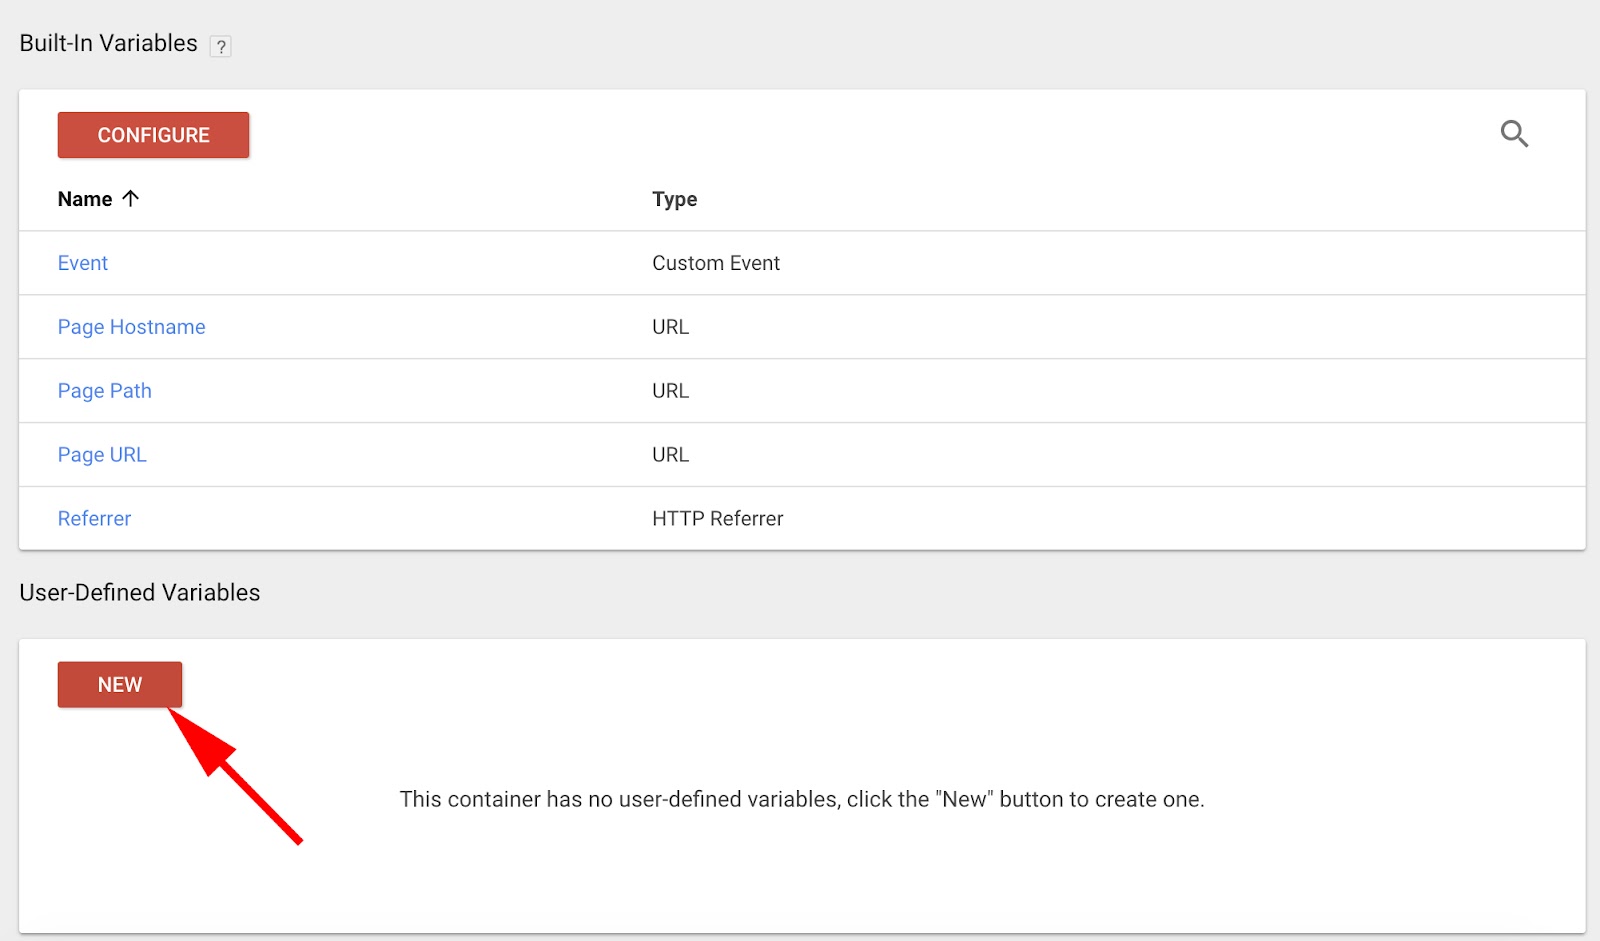
2. Under “User-Defined Variables”, click “New”.
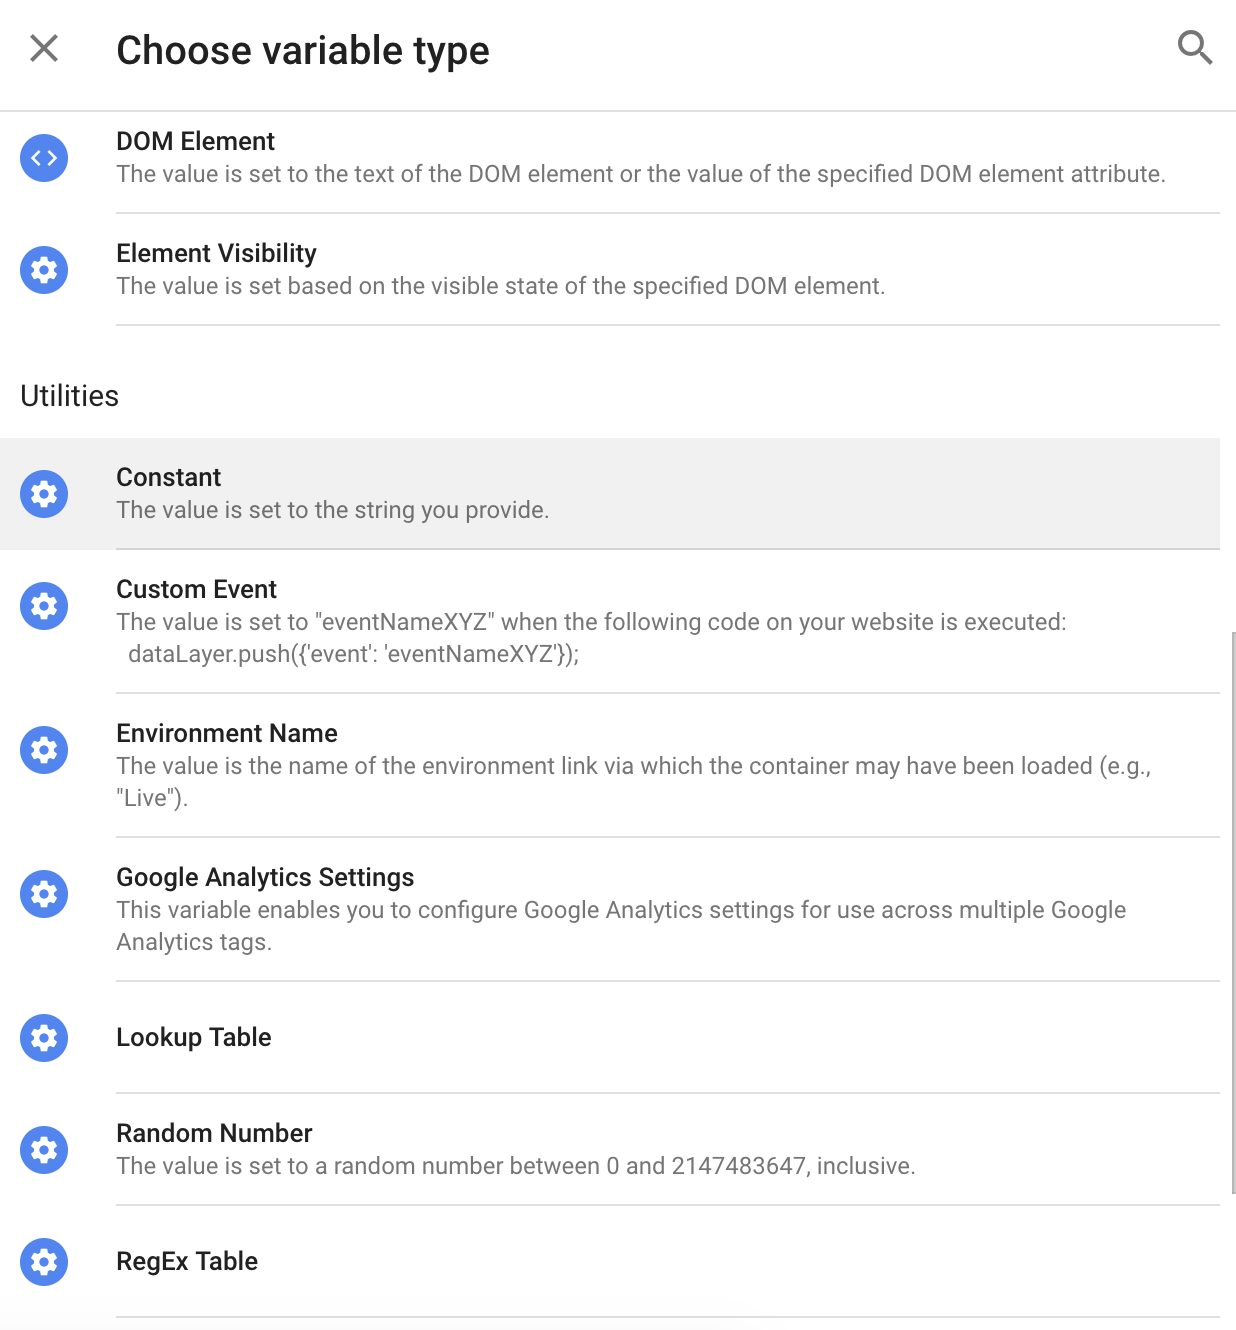
3. Name your variable -- I named it “GA Tracking ID” so I’d remember. Then, click the “Variable Configuration” box.

4. Choose “Constant” as your variable type, since you don’t want the ID to change for different tags.
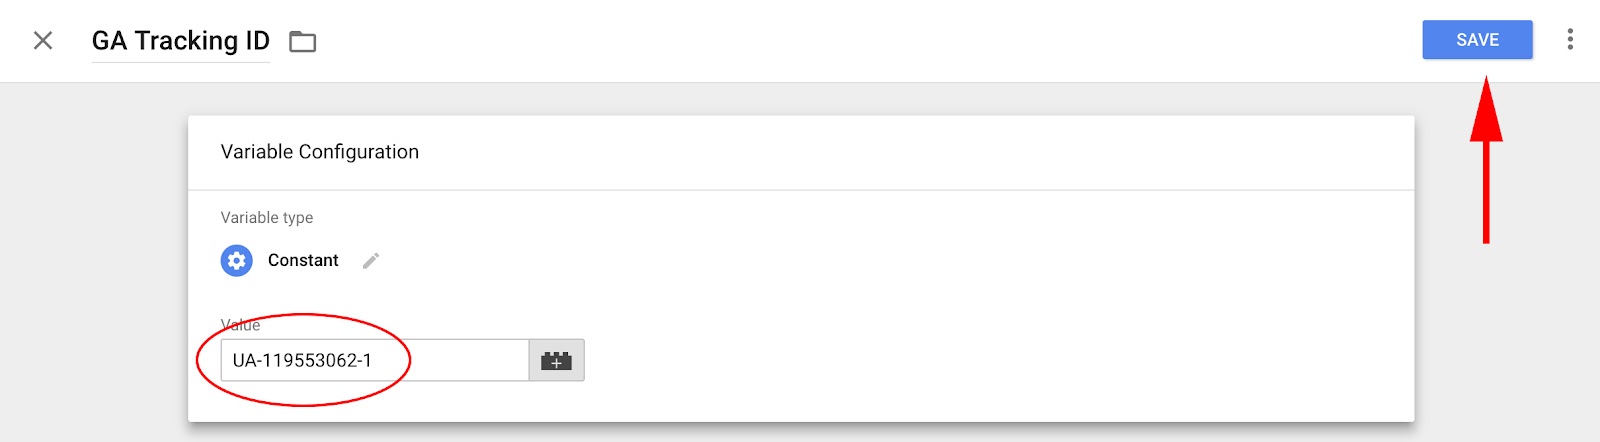
5. Now, input your Google Analytics Tracking ID number into the “Value” box, and then select “Save” in the top right.
Next, let’s edit our “TestTag1” that we created earlier in this post, and include the new variable you just created.
How to Edit a Tag and Change its Value
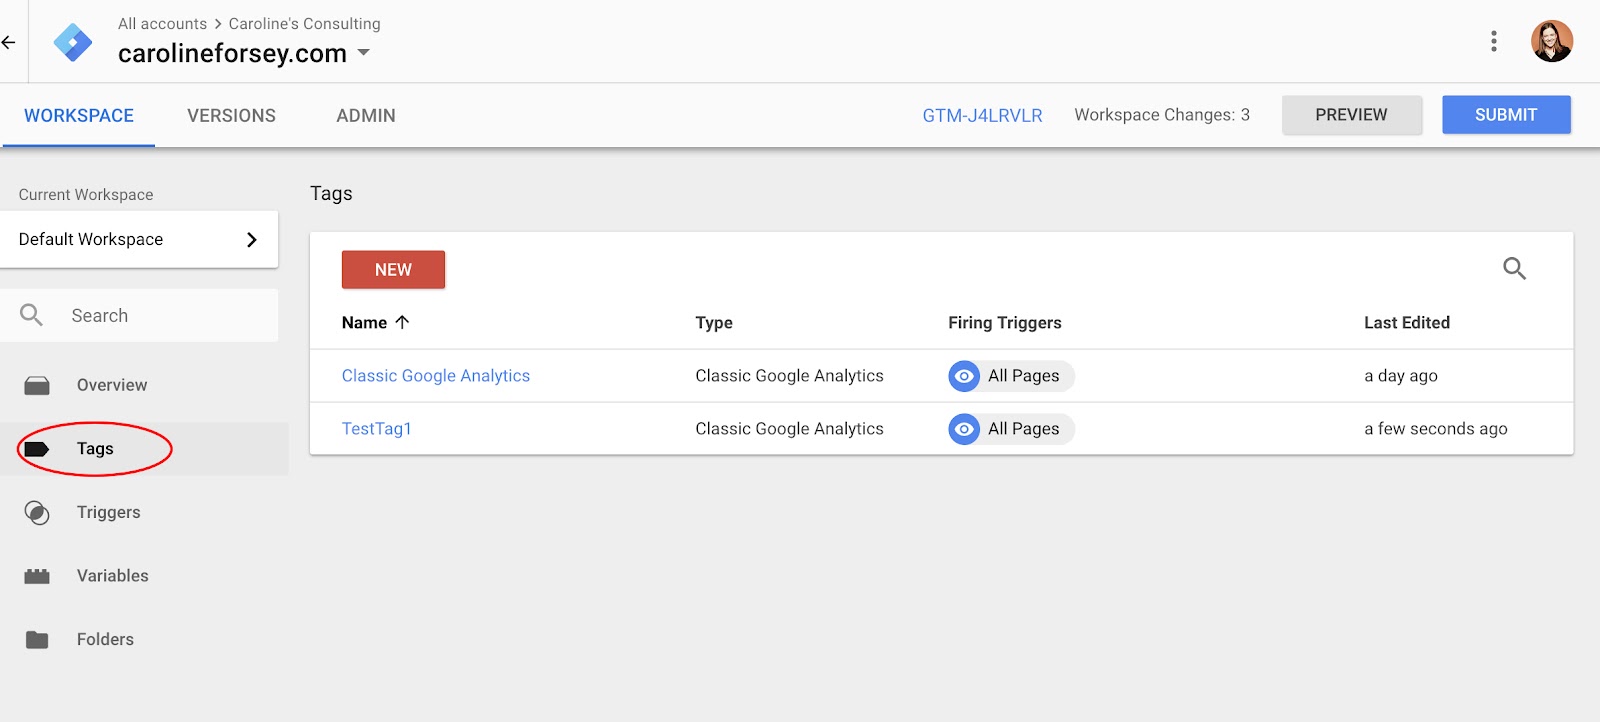
1. Back on your homepage, select “Tags” from your side bar. Click on the tag you want to edit (I clicked “TestTag1”).
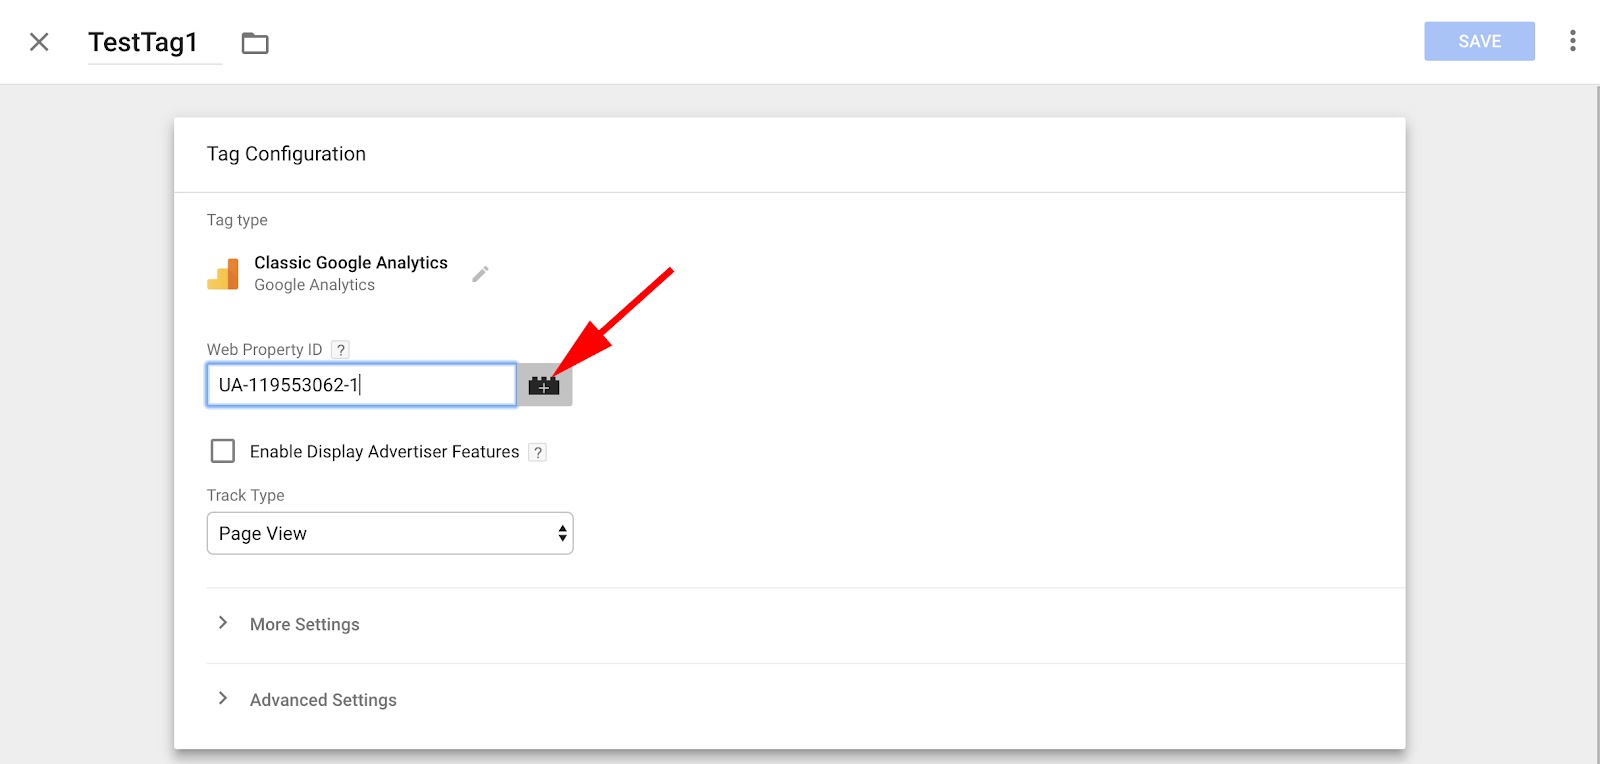
2. Click the grey “+” icon beside the “Web Property ID” box.
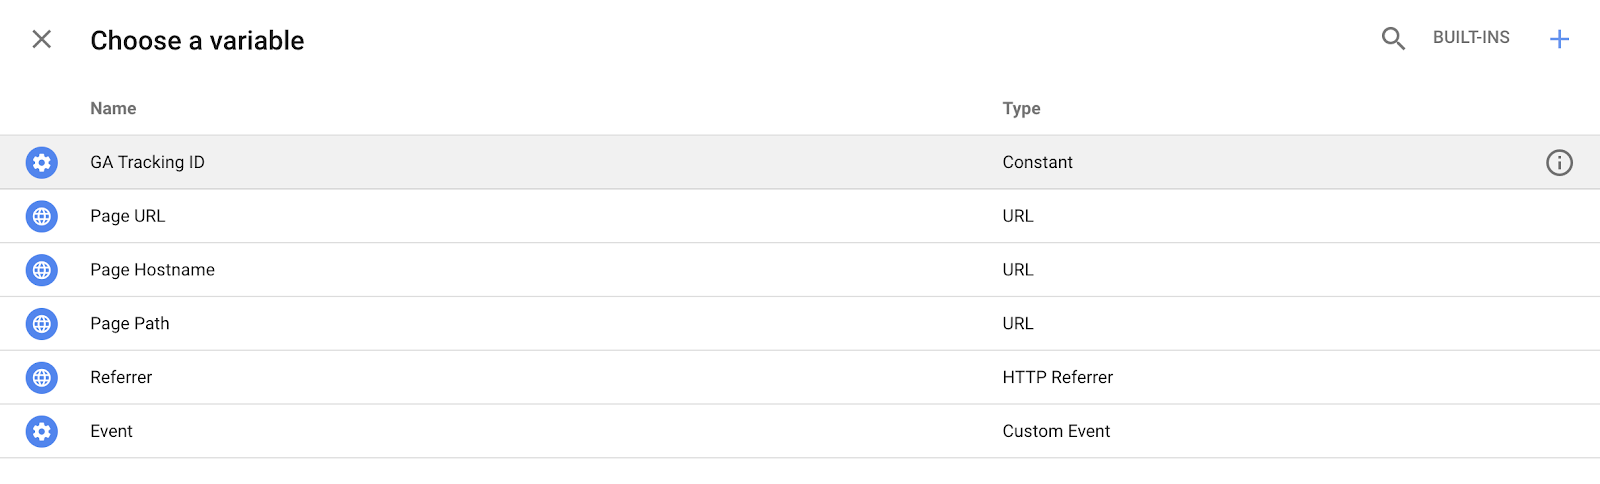
3. A “Choose a variable” box will pop up, and the first option, “GA Tracking ID”, is the variable we just created. Select that.
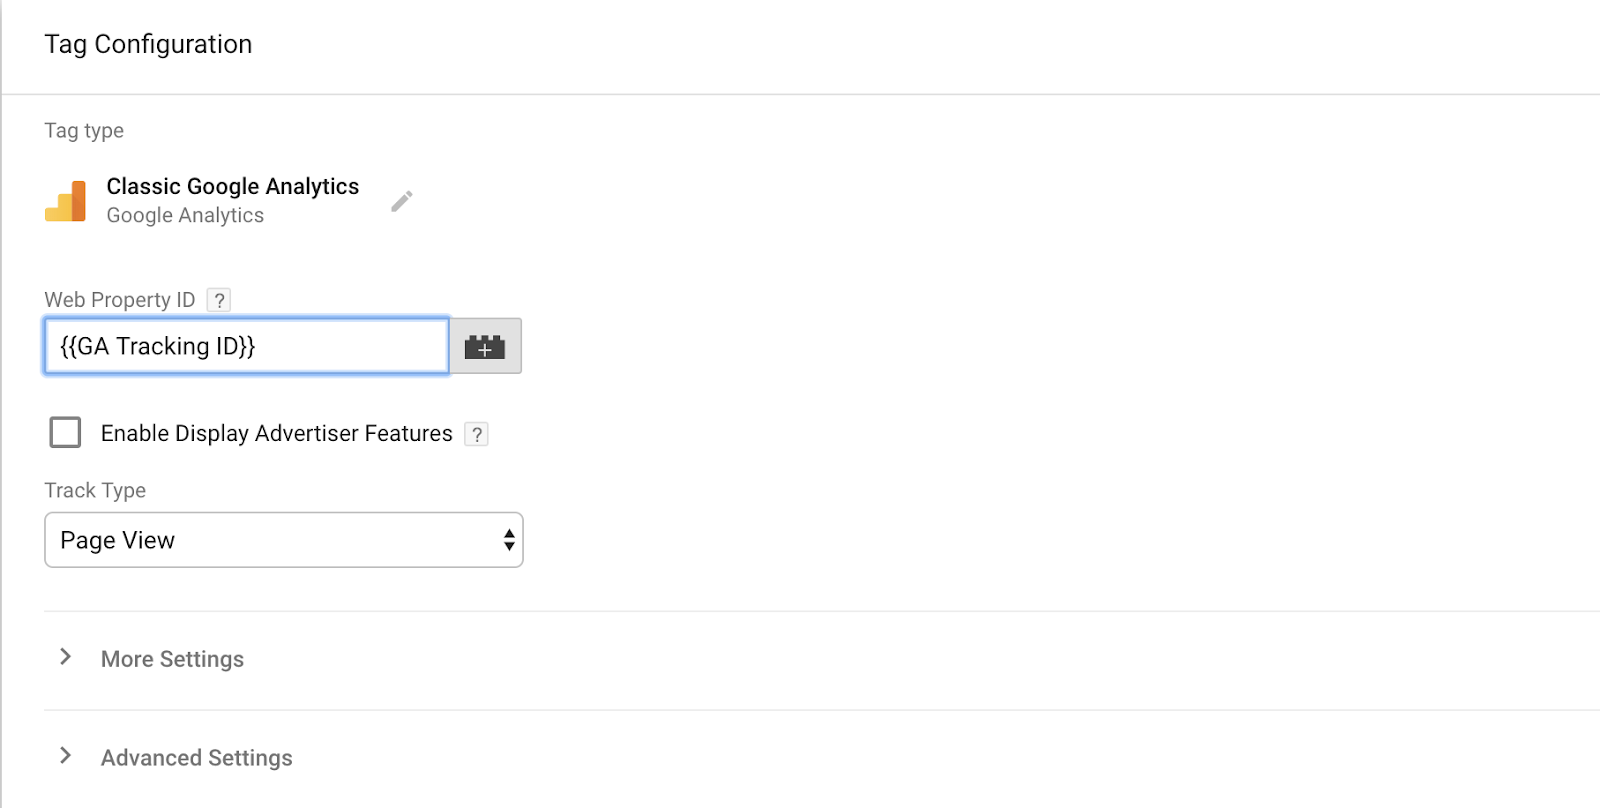
4. Now, your tag’s “Web Property ID” should say (or whatever you named your variable). Click save, and your tag is updated.
Comments
Please sign in to leave a comment.