For bookings, there is a step to collect information from the customer. There are default fields on all bookings, like Name, Phone, and email. But you can also add your own custom fields that is an input value, dropdown, or checkbox. You'll need to create the custom field(s) and add it to your event settings. Follow the steps below to learn how to do this:
1. Create the custom field in the Custom Fields tab under the Administration module. If you don't know this process, click here to learn more about custom fields.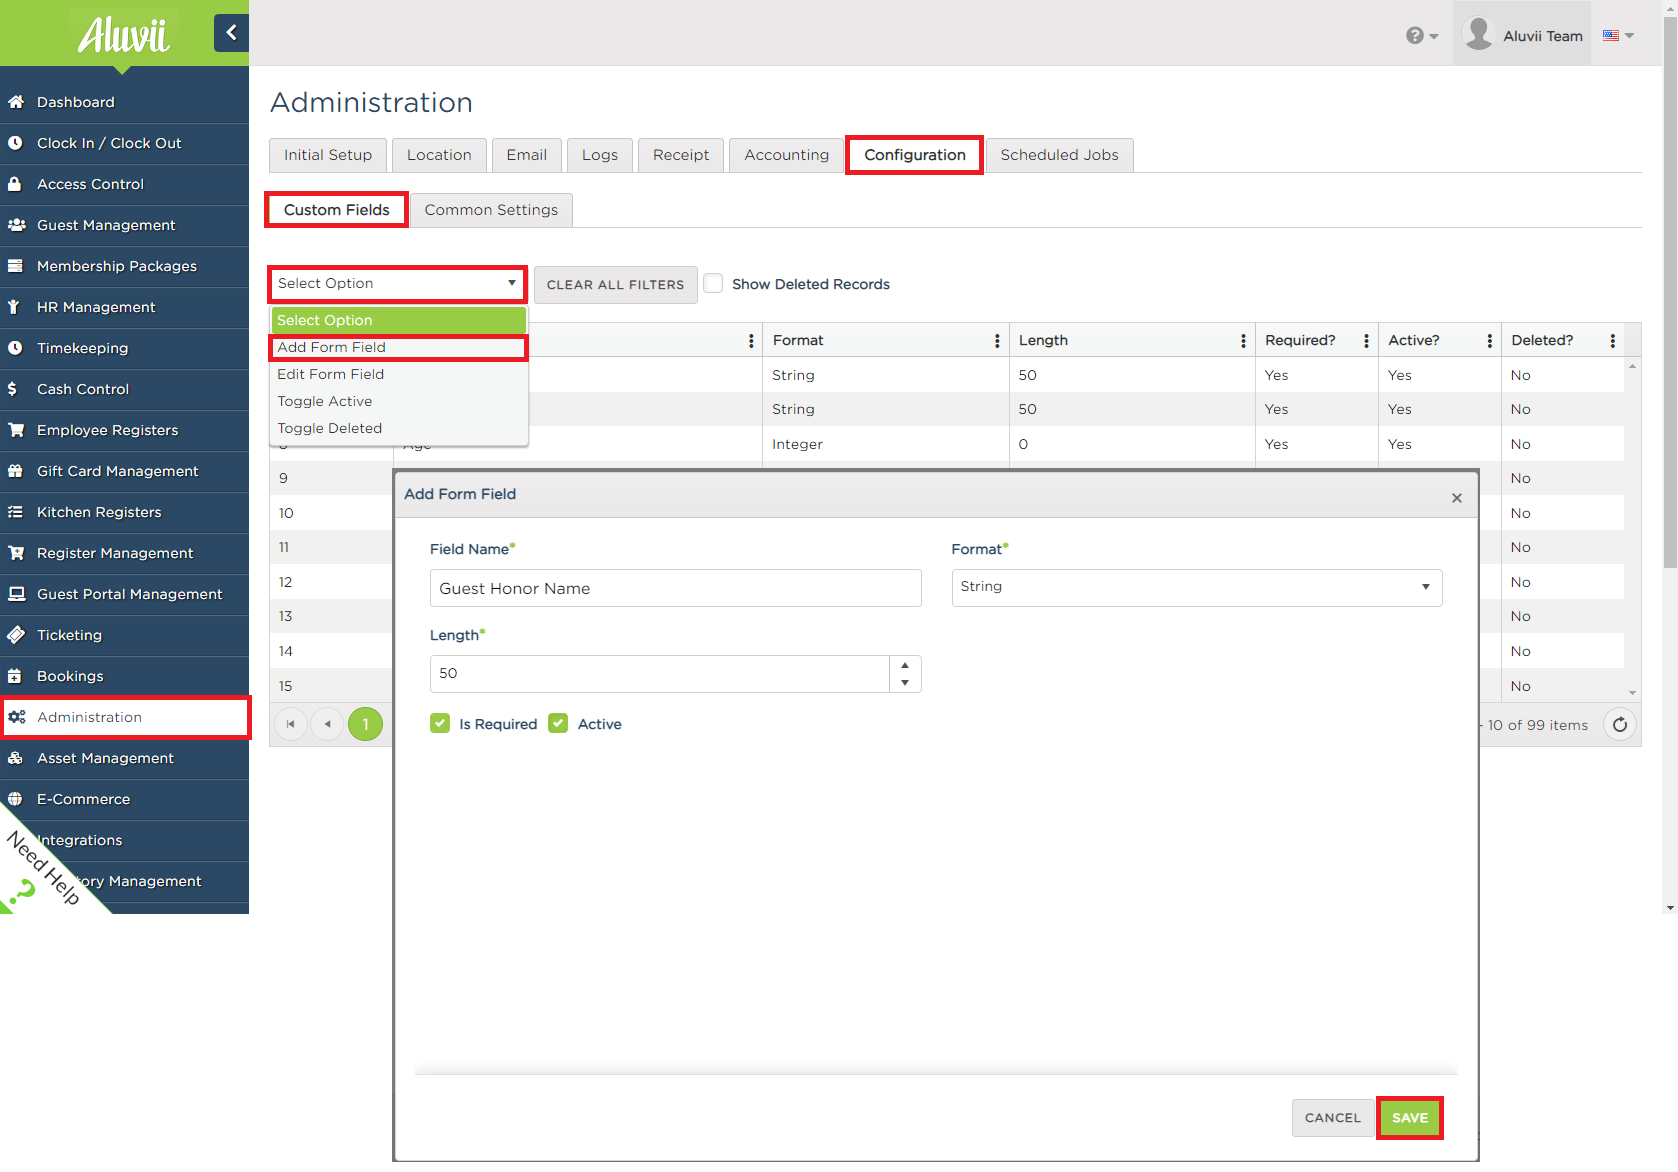
2. Once you've created the custom fields you want, navigate to the Event Management module and then the Assignments tab to edit your existing assignment for the party or event you want to add the custom field. Under the Order Forms tab within the Assignment popup window, select the custom fields you just created on the drop-down menu, and click the Save button. 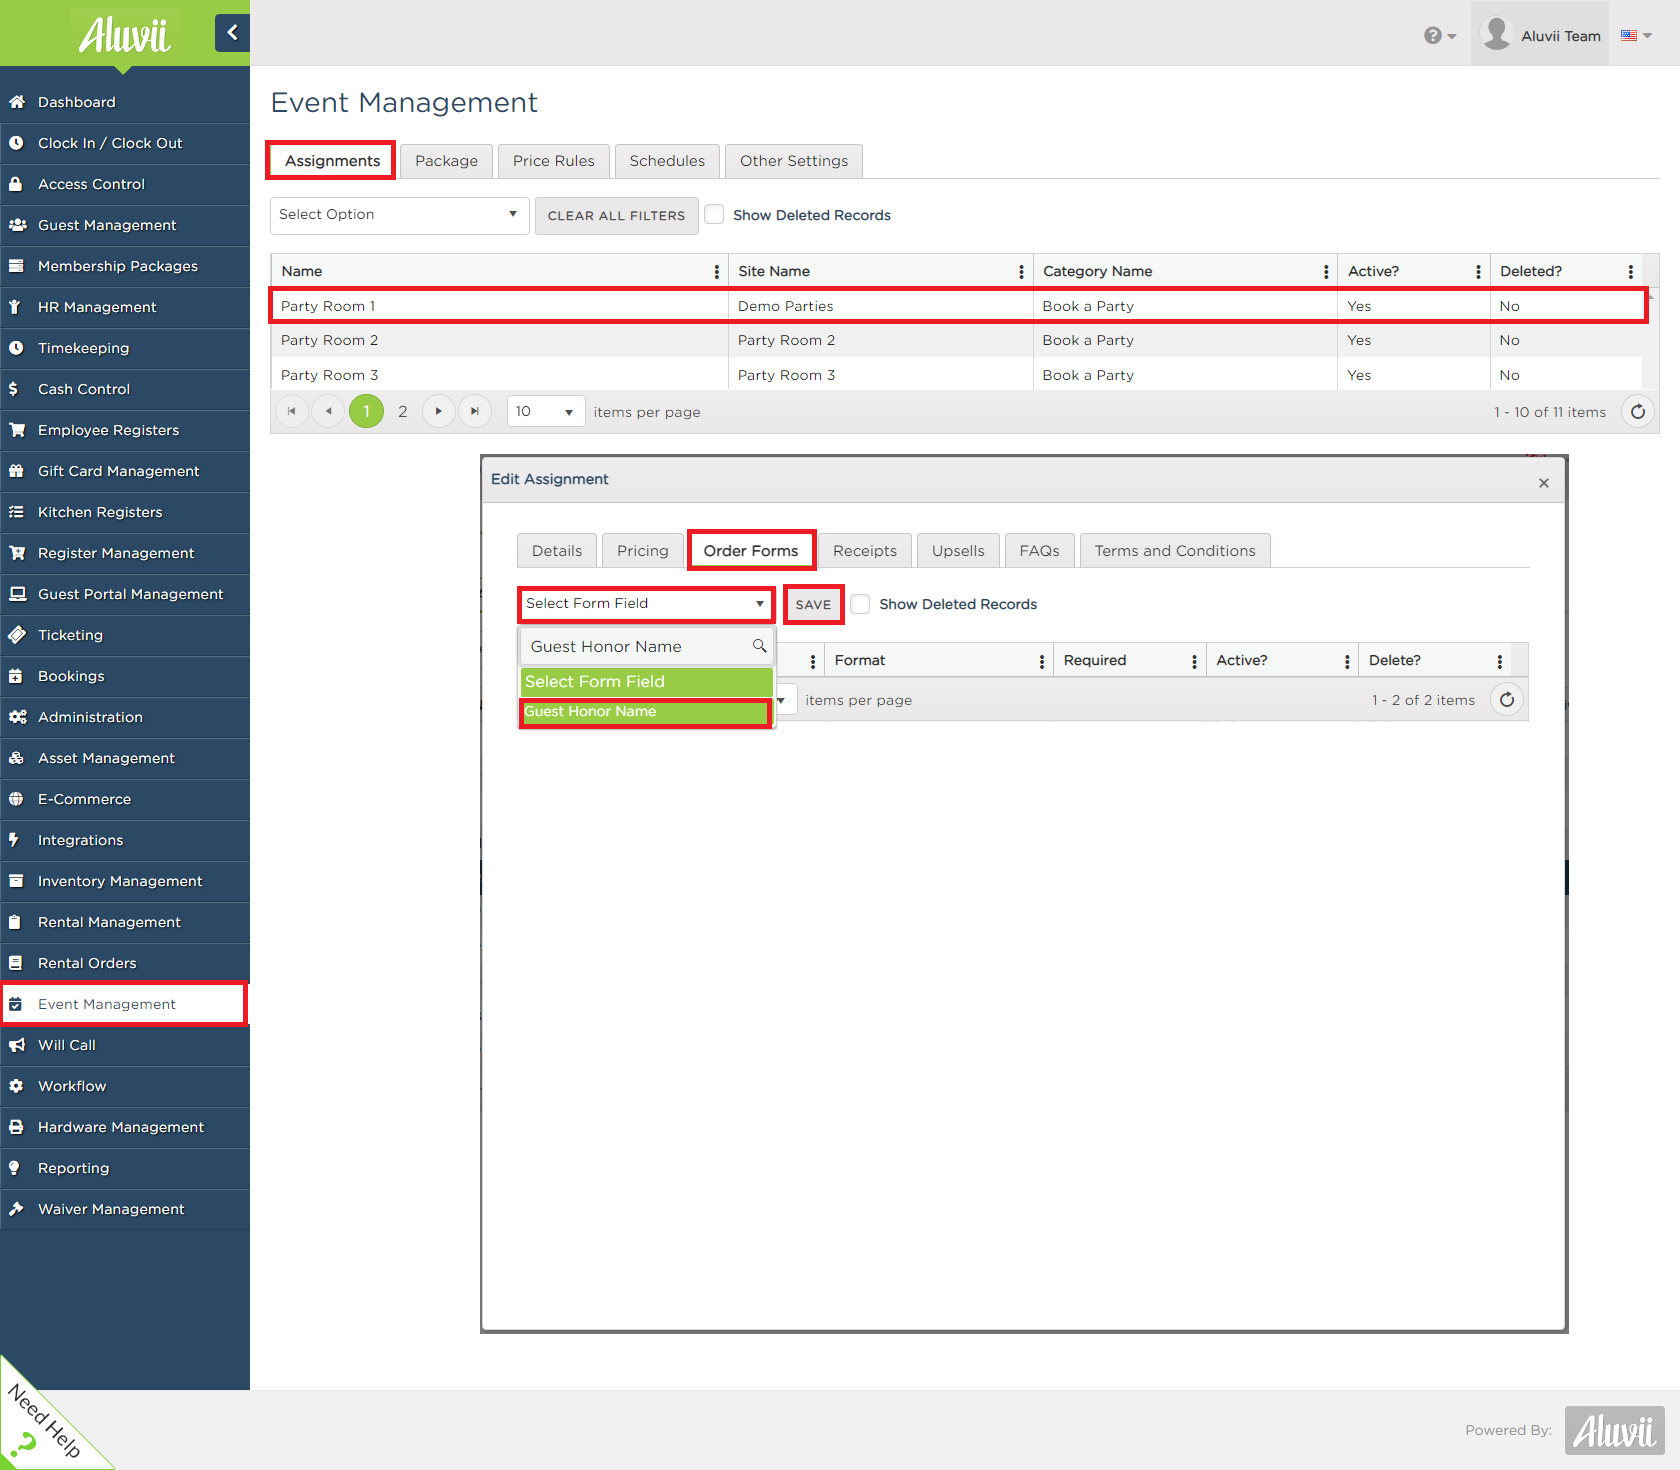
3. Once added, the custom field will show on the list. Make sure the Active box is checked to the corresponding field(s) you want to enable.
4. To confirm it was properly added, start a booking on the online event portal and that field will show on step 5 of the booking process.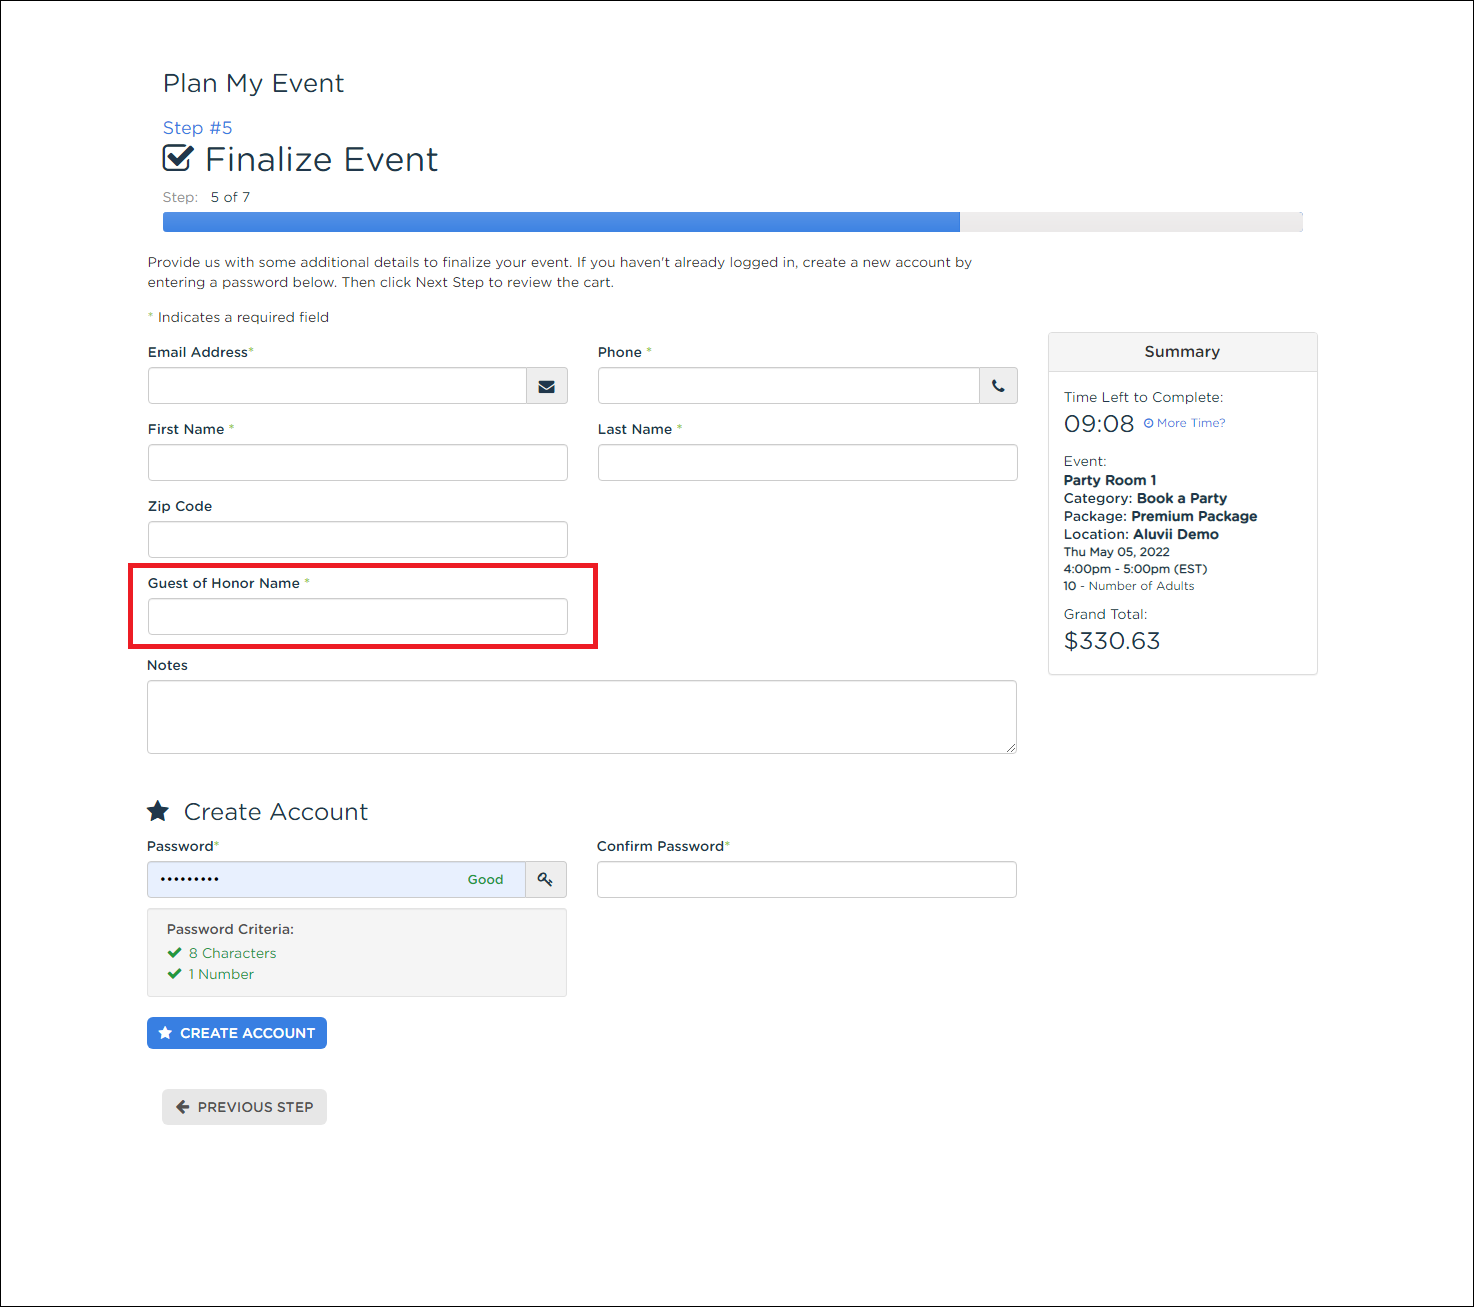 That should also show in the Booking Data tab when you book the party in the employee portal Bookings module.
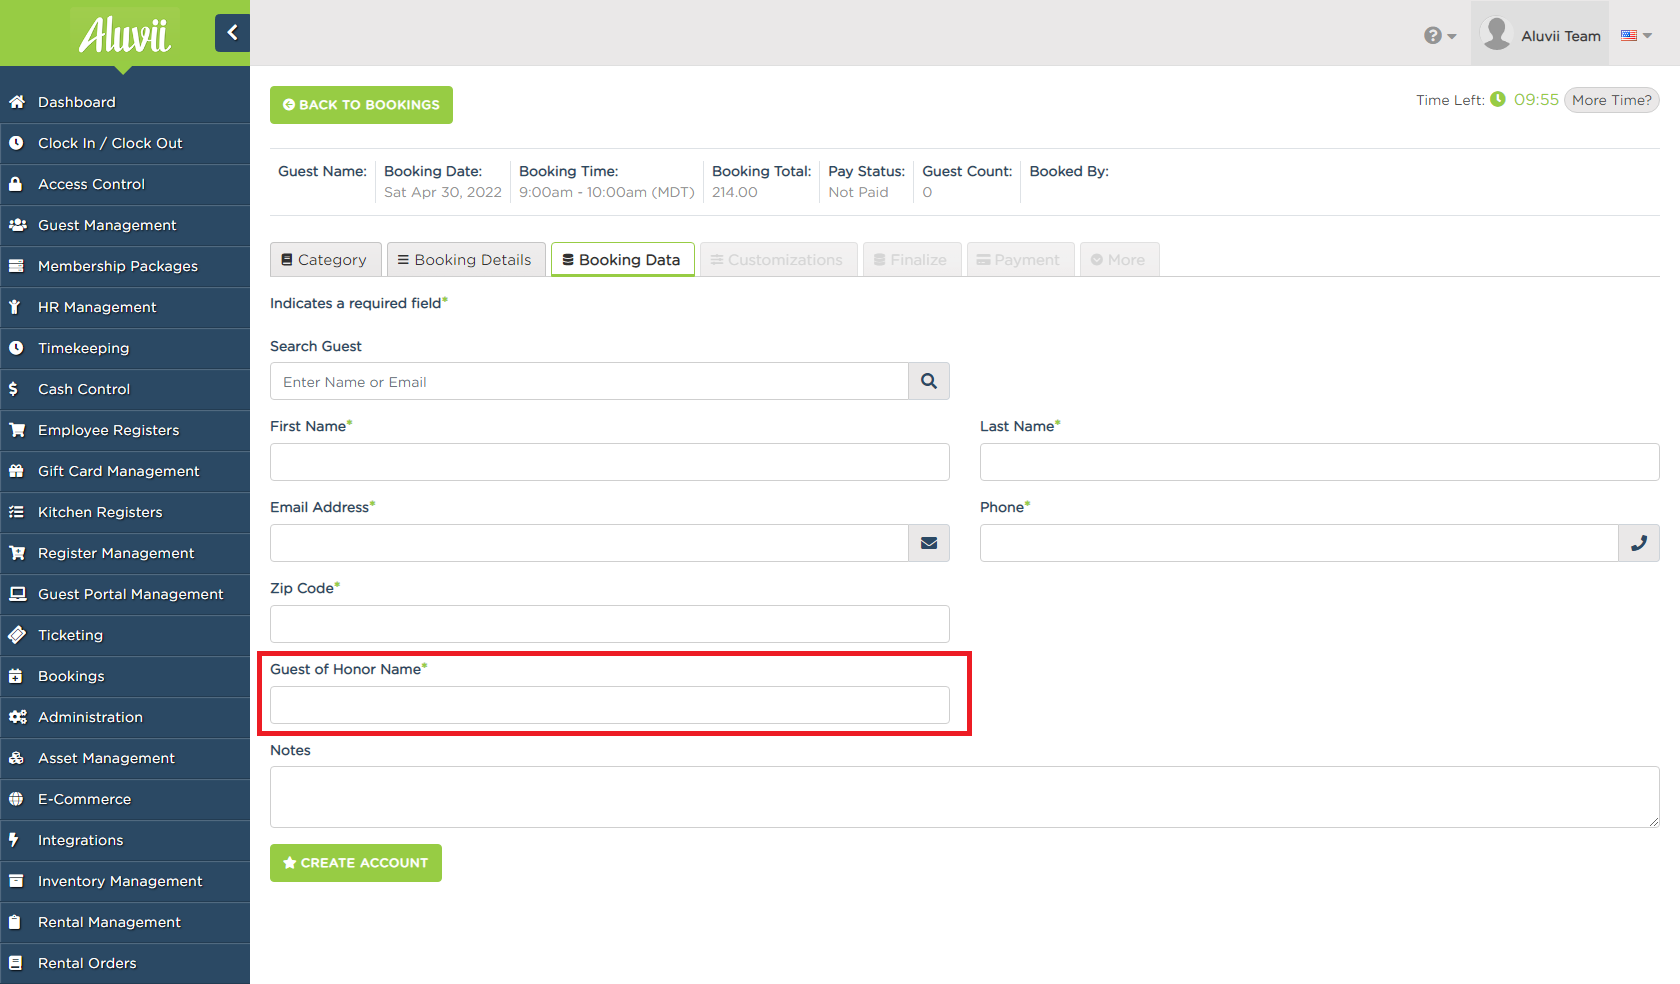
Comments
Please sign in to leave a comment.