This article explains how to customize guest Membership ID cards.
- Decide on the print orientation of the membership ID card of the Membership Package. The default orientation setting in the membership package is set to Landscape.

- But if you wanted to have it on Portrait orientation, you can enable the "Show Portrait" option in the Membership Package settings.

- Next, design a layout of your card according to your offered orientation(s) and save it as an image file on your computer. You can edit these images using common image editing software such as Paint or Microsoft Photos. We recommend saving it as a PNG or JPEG image.
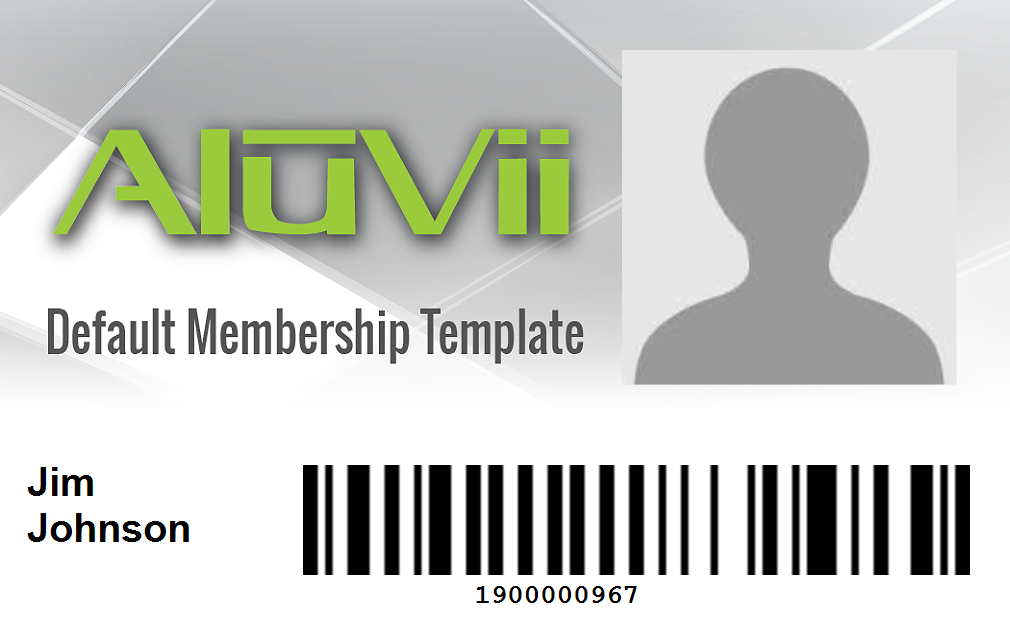
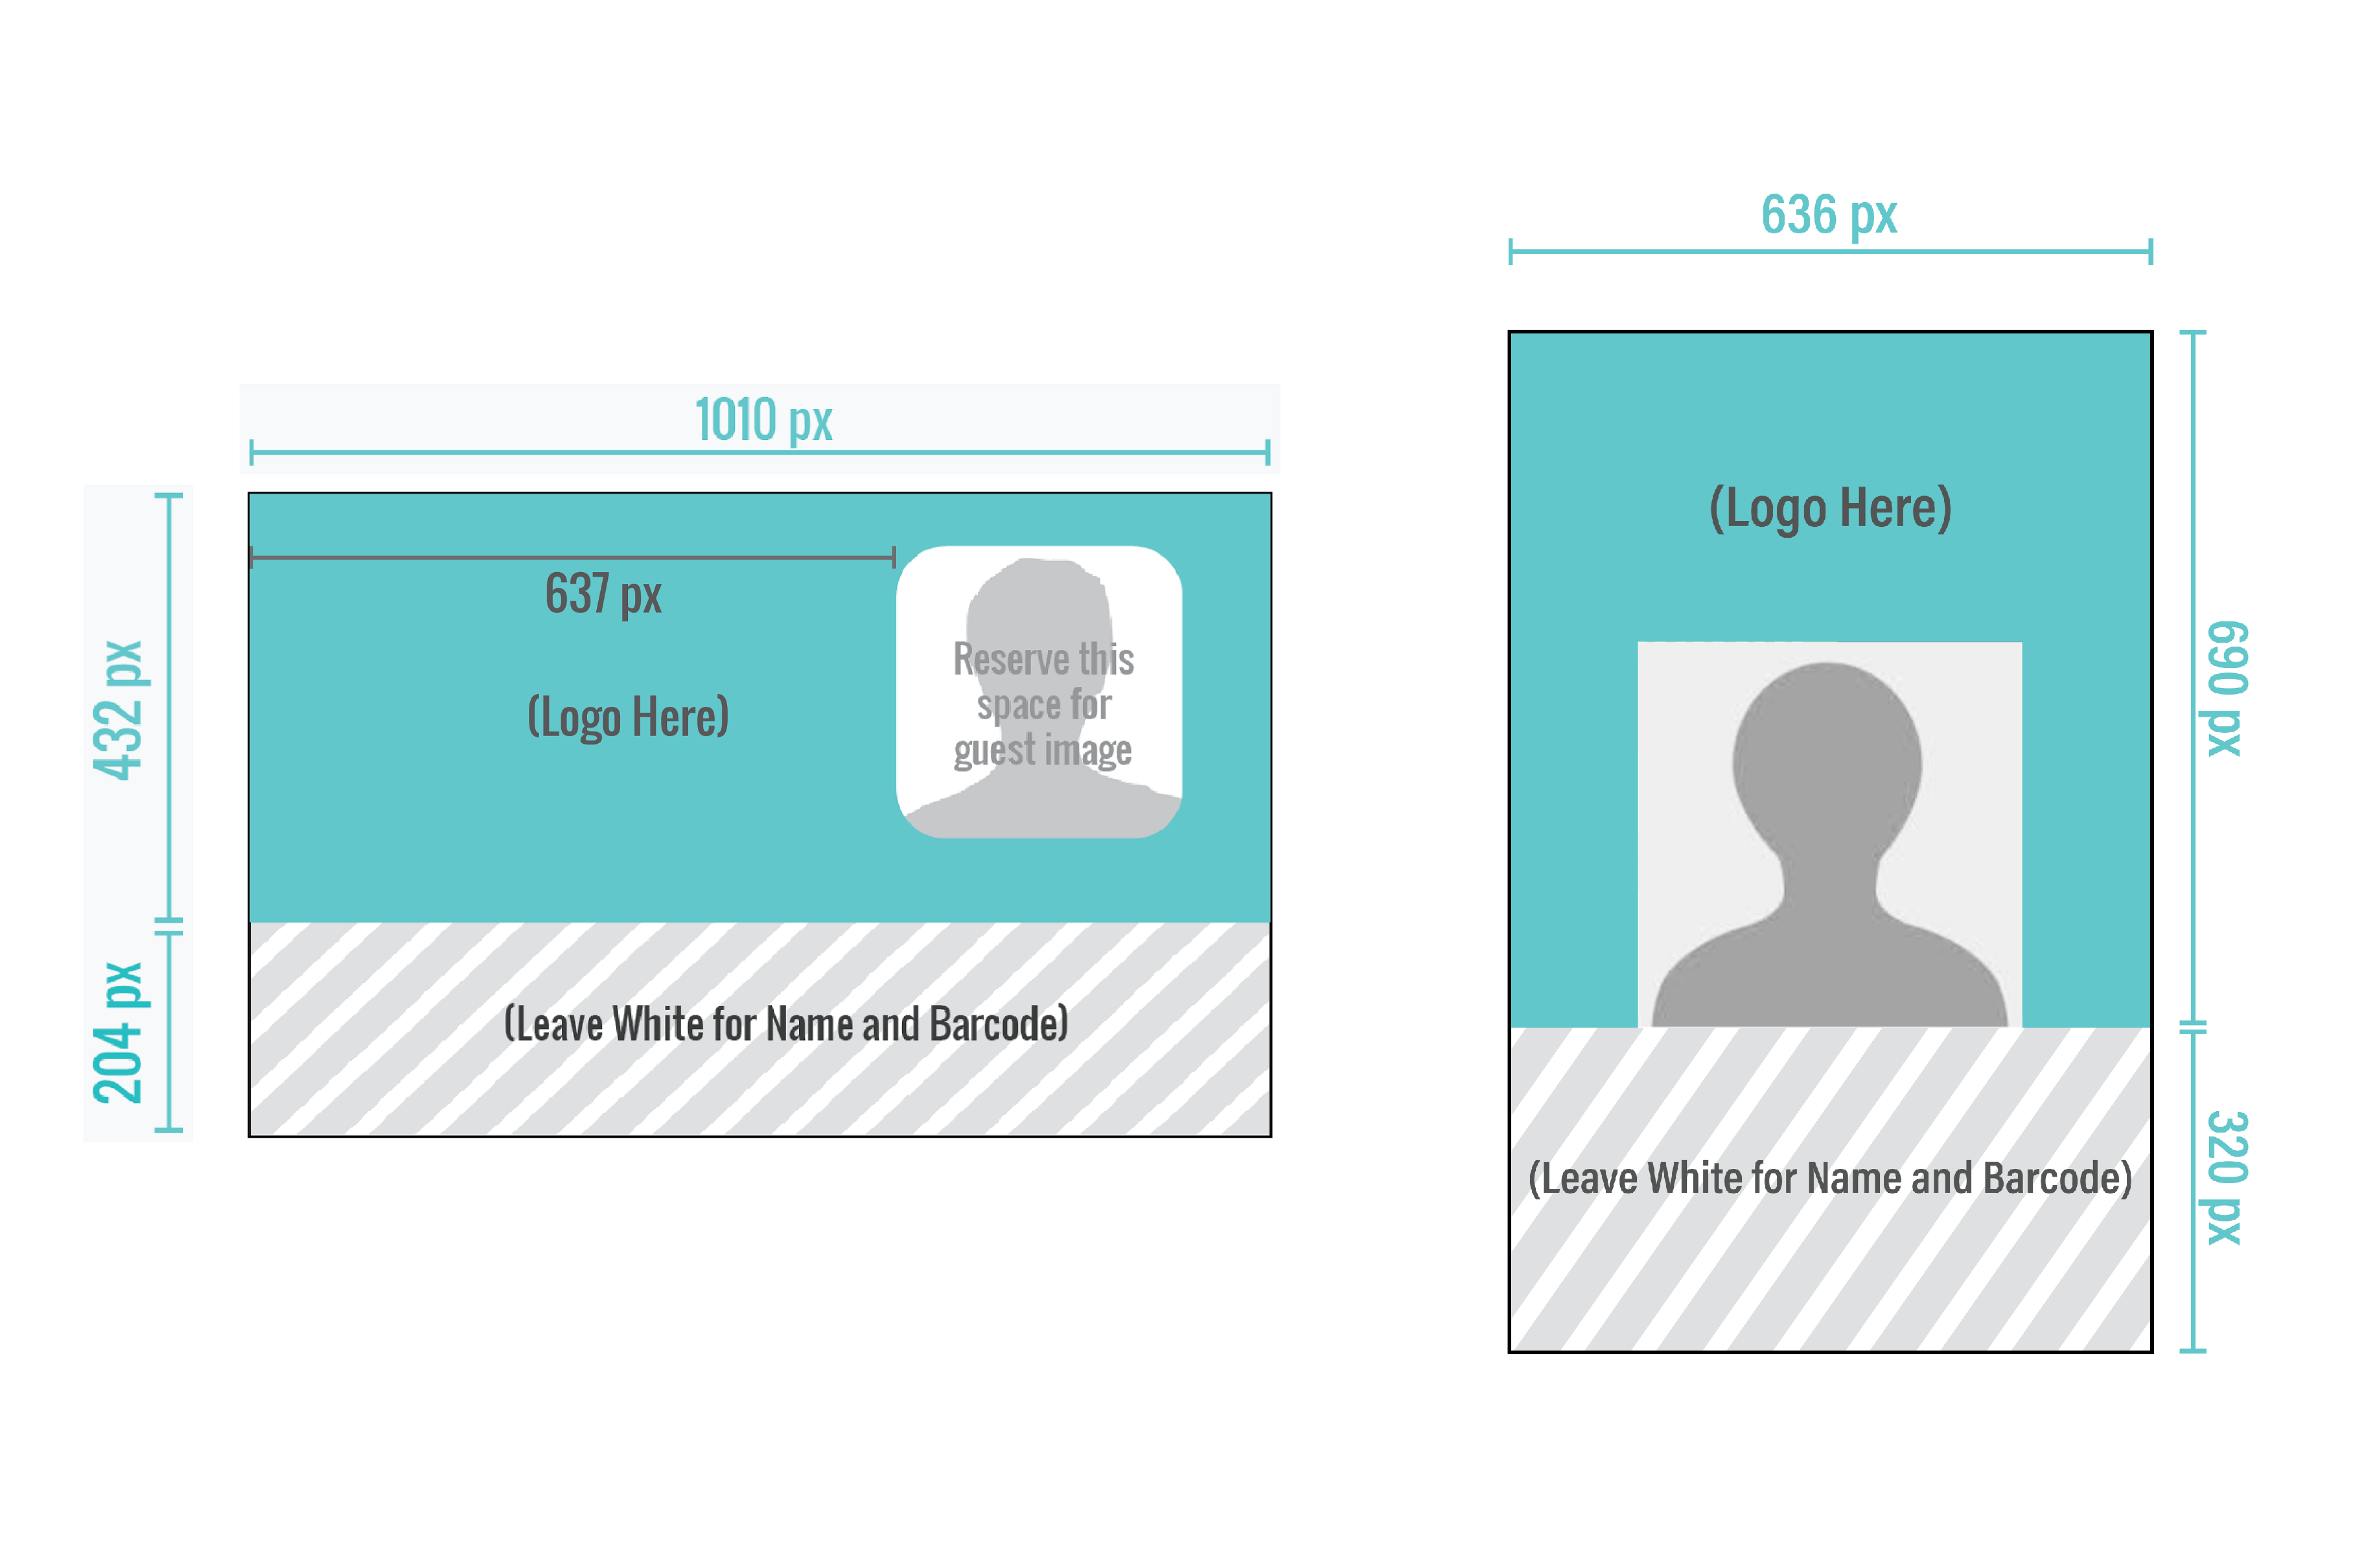 NOTE: The required size for the overall background is 1010 pixels by 636 pixels, but you will need to leave some white spaces for the name and barcode number. You may also want to adjust the logo's location in the background image so it will not interfere with the guest's profile picture.
 - Upload the finished image layout from your computer on the Membership Card Background section in the Membership Package settings.
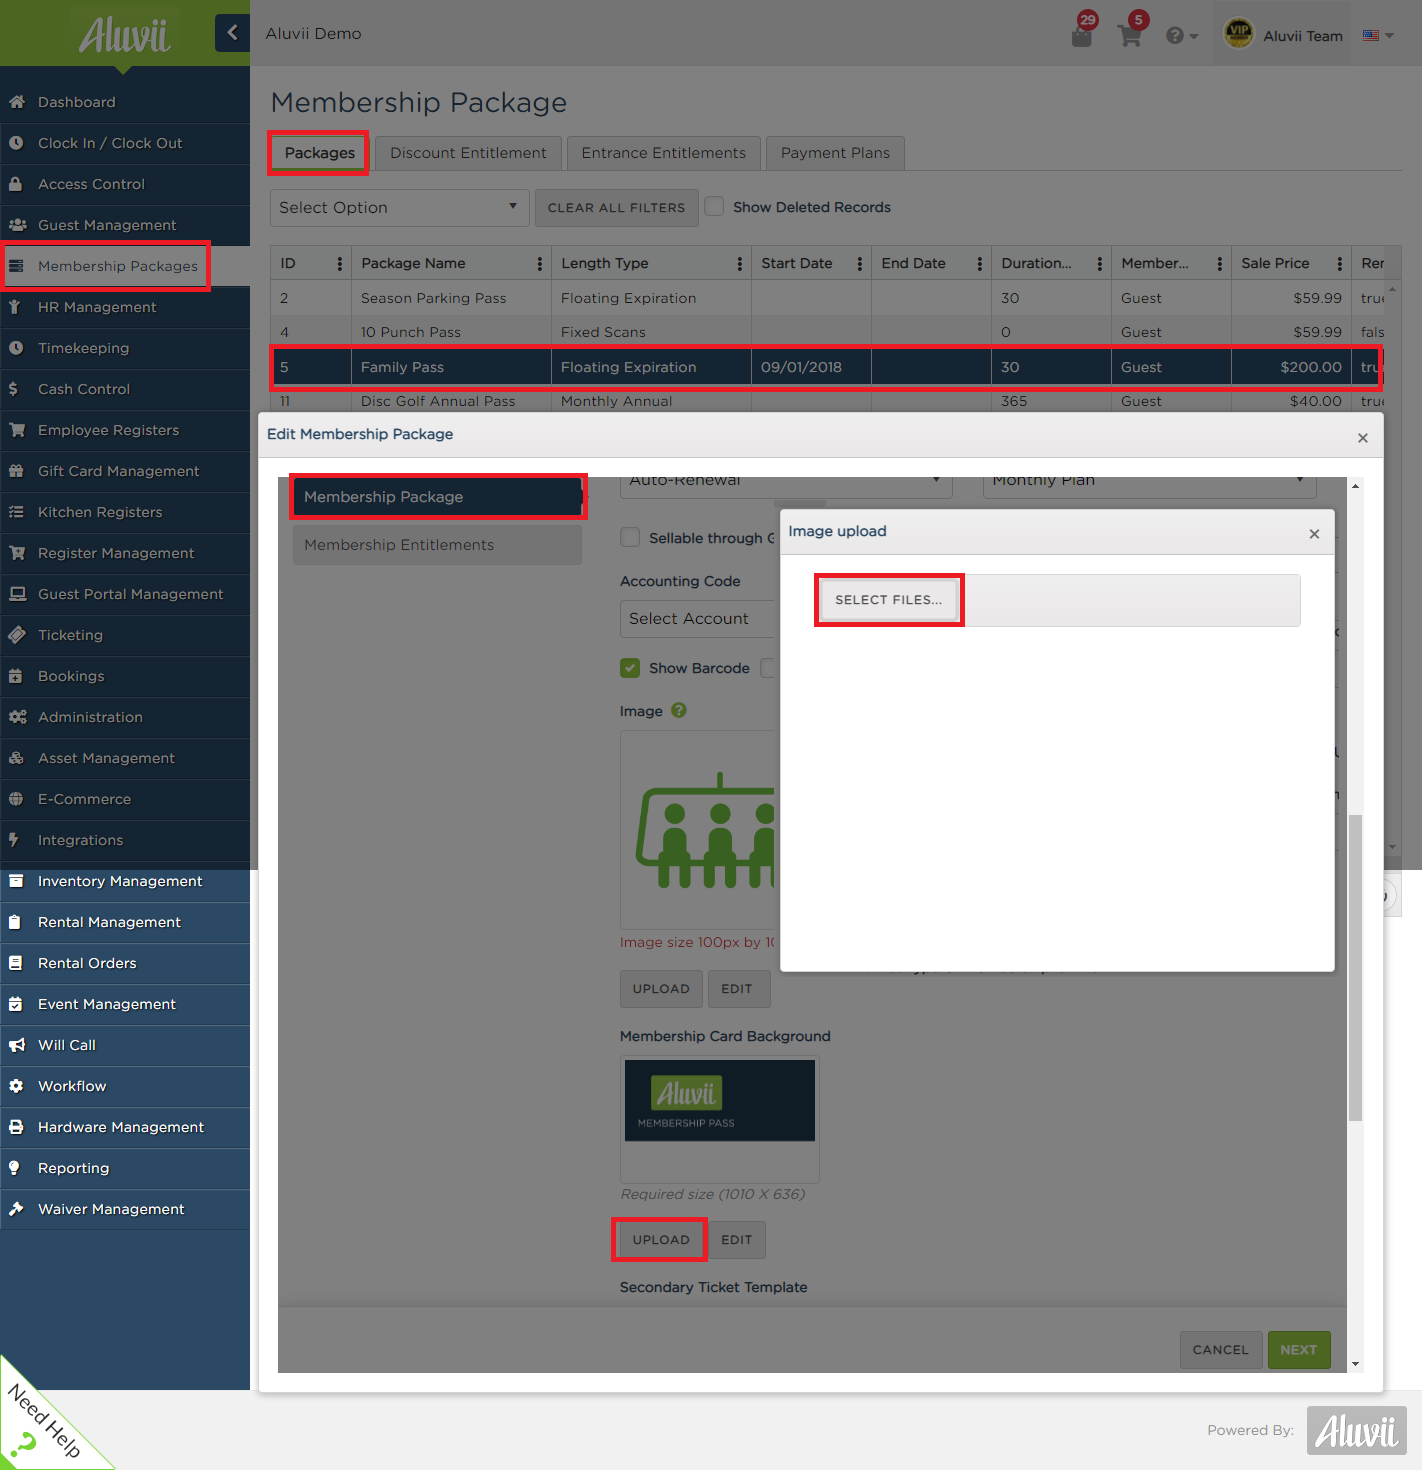 NOTE: This process will only apply to the current Membership Package you are editing. Repeat this process for any other Membership Packages that you would like to have this same card design.
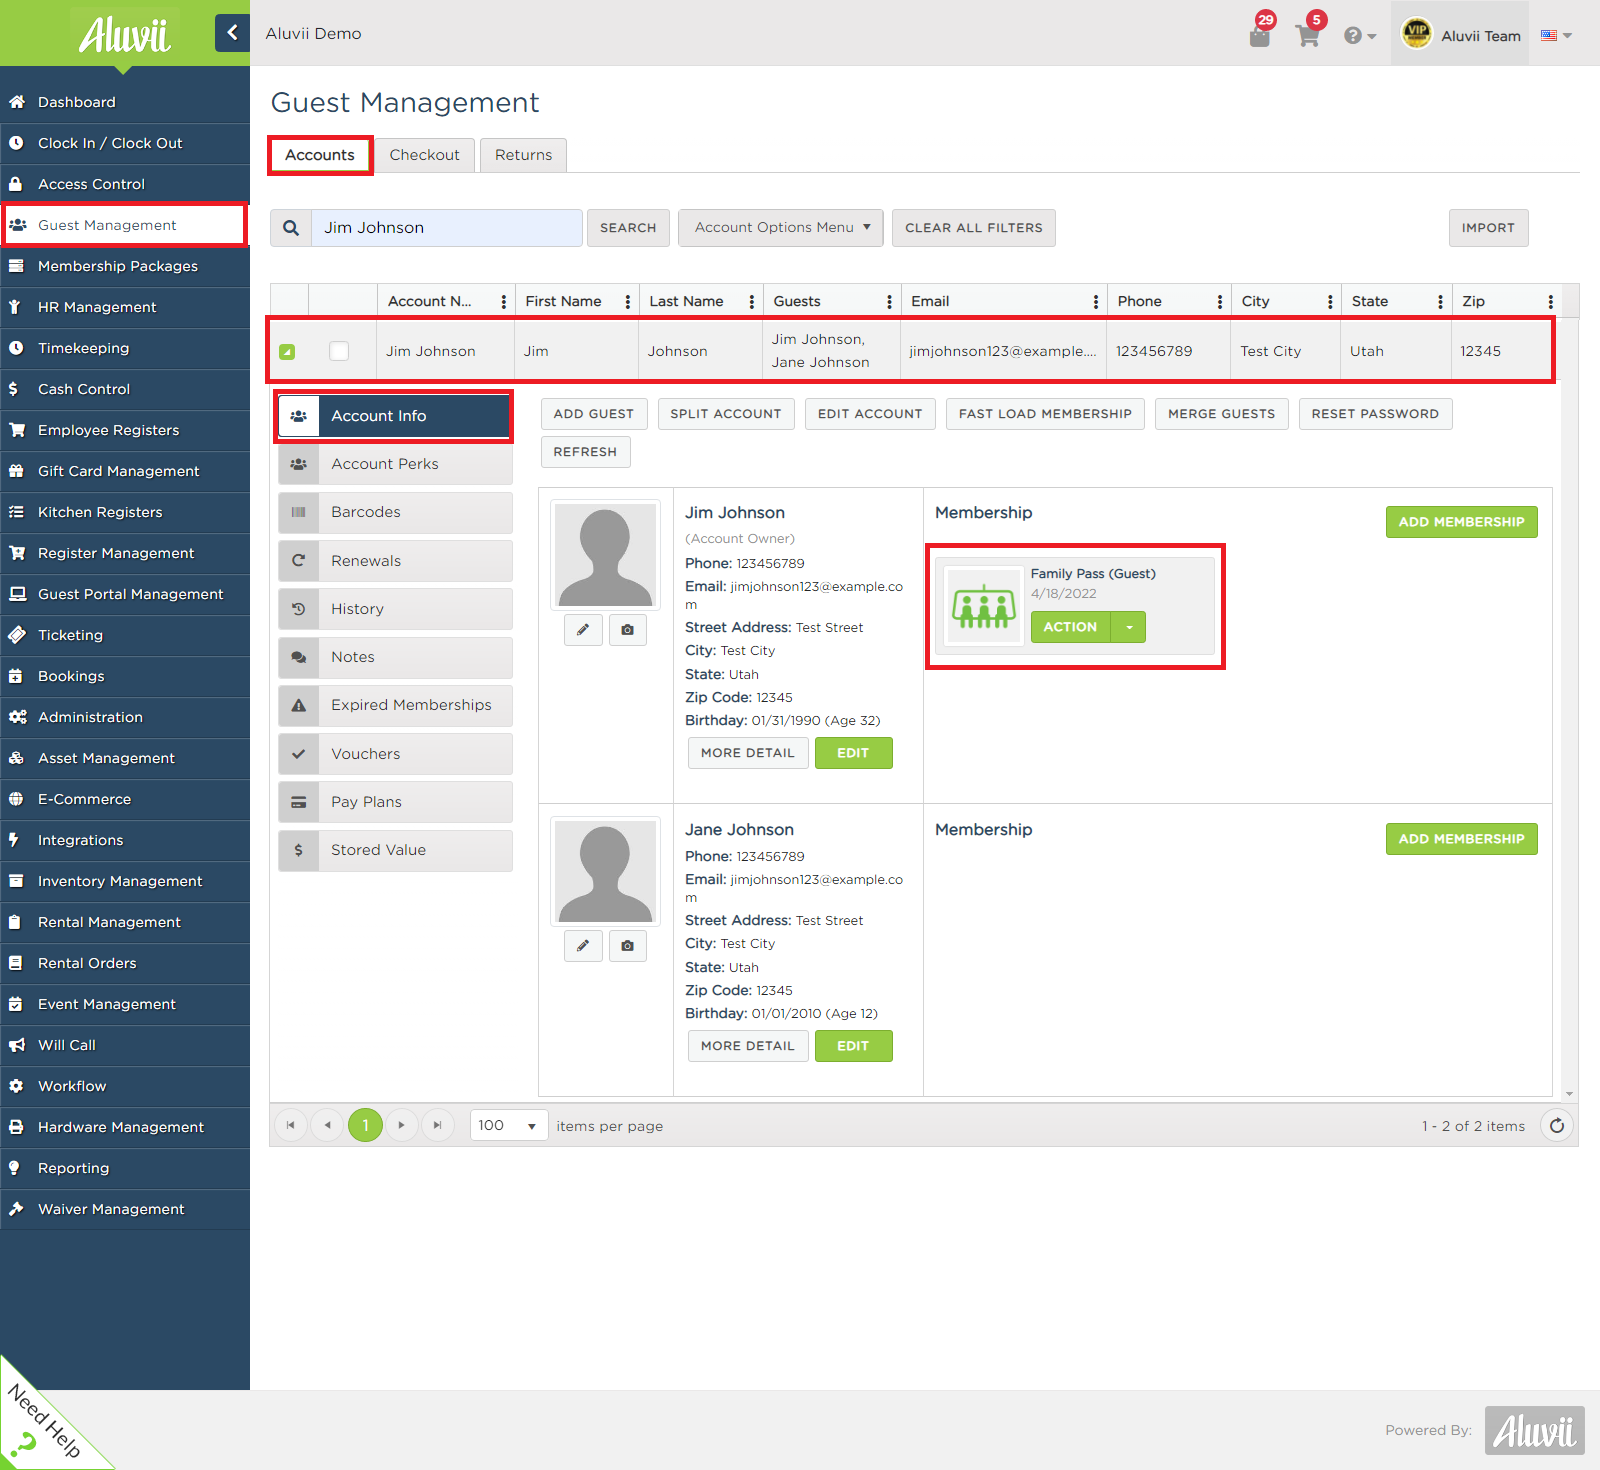
 - When you sell this Membership Package to your customer. Make sure that the Membership Package icon is associated with the guest name on that account.
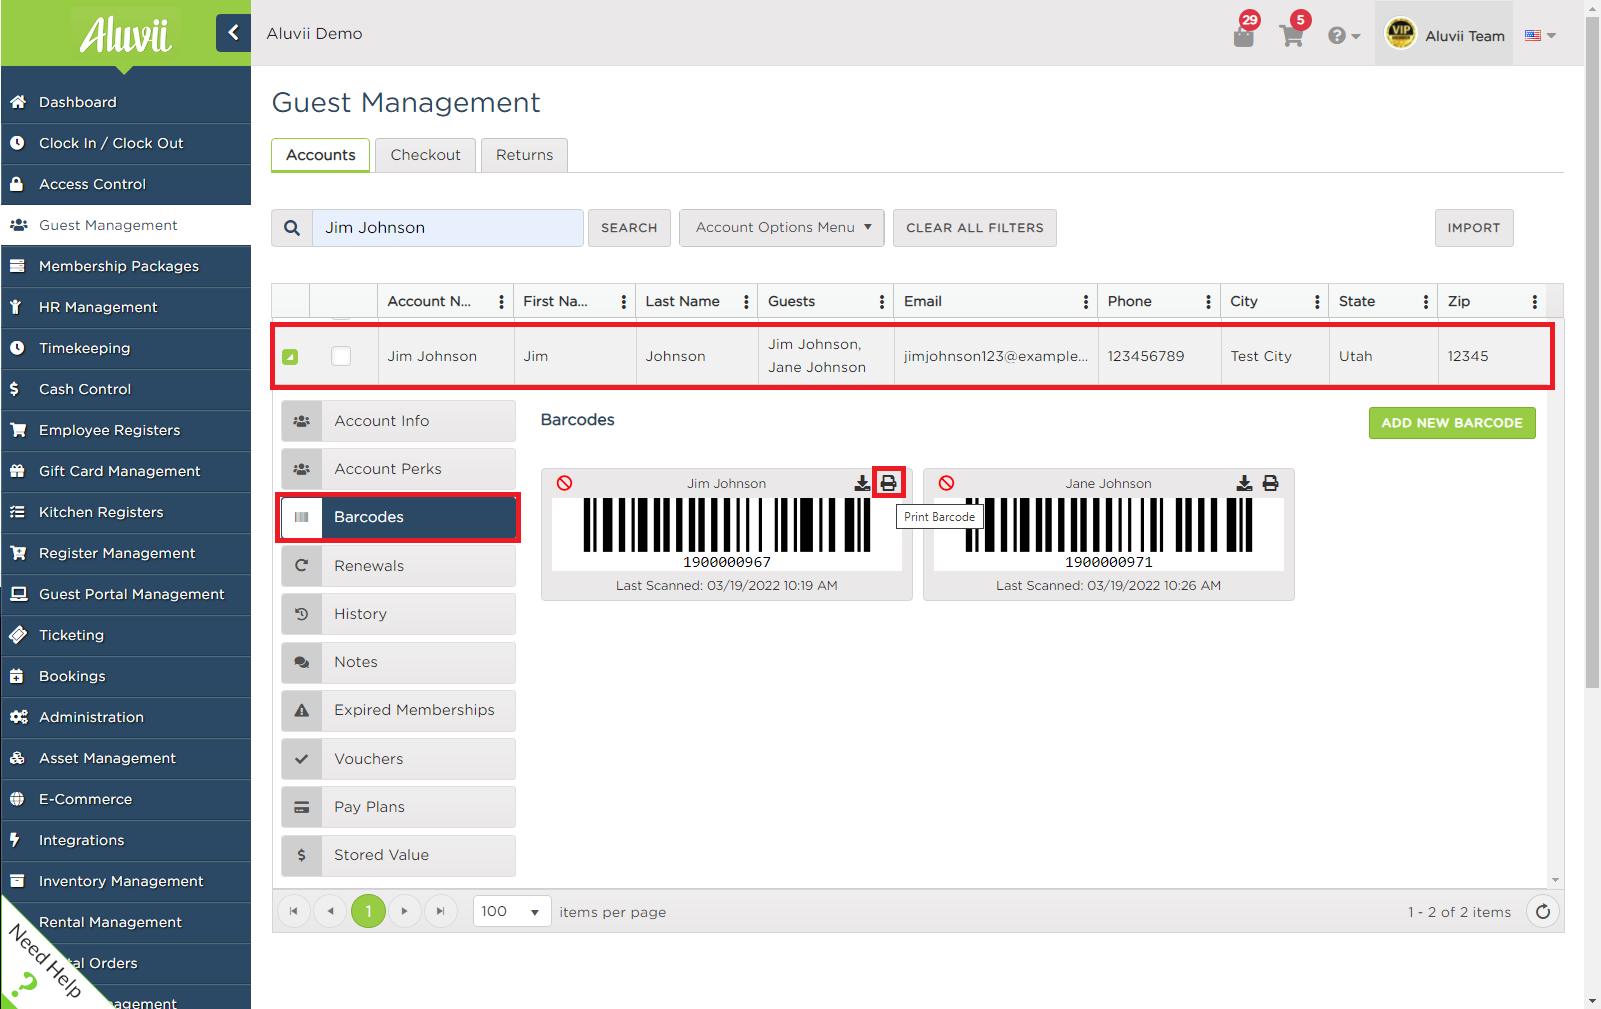
- Then, go to the Barcode section, and click on the Print icon just above the Guest's name. It will print automatically if you have a card printer connected to your computer. Otherwise, it will download an image file so you can copy and have it print to the computer where the card printer is connected. Click here to know more about membership barcodes.
- Finally, this membership card is now ready to be scanned when presented by the guest on site. Click here to read more about scanning membership card barcodes.
Comments
Please sign in to leave a comment.