Some products you sell may require that a waiver be signed by the customer when purchased. This article shows you how to set this up on the online store portal. Here's how to do it:
-
First, we assume that you already know about session products and how to add them to the for sale online. If not, see our article about session products and adding products in eCommerce.
-
Then, go to the eCommerce > Product setting and edit the product that requires the waiver. On the edit window, check the box for "Require Waivers to Purchase", and select which waiver is required in the Select Waiver dropdown.
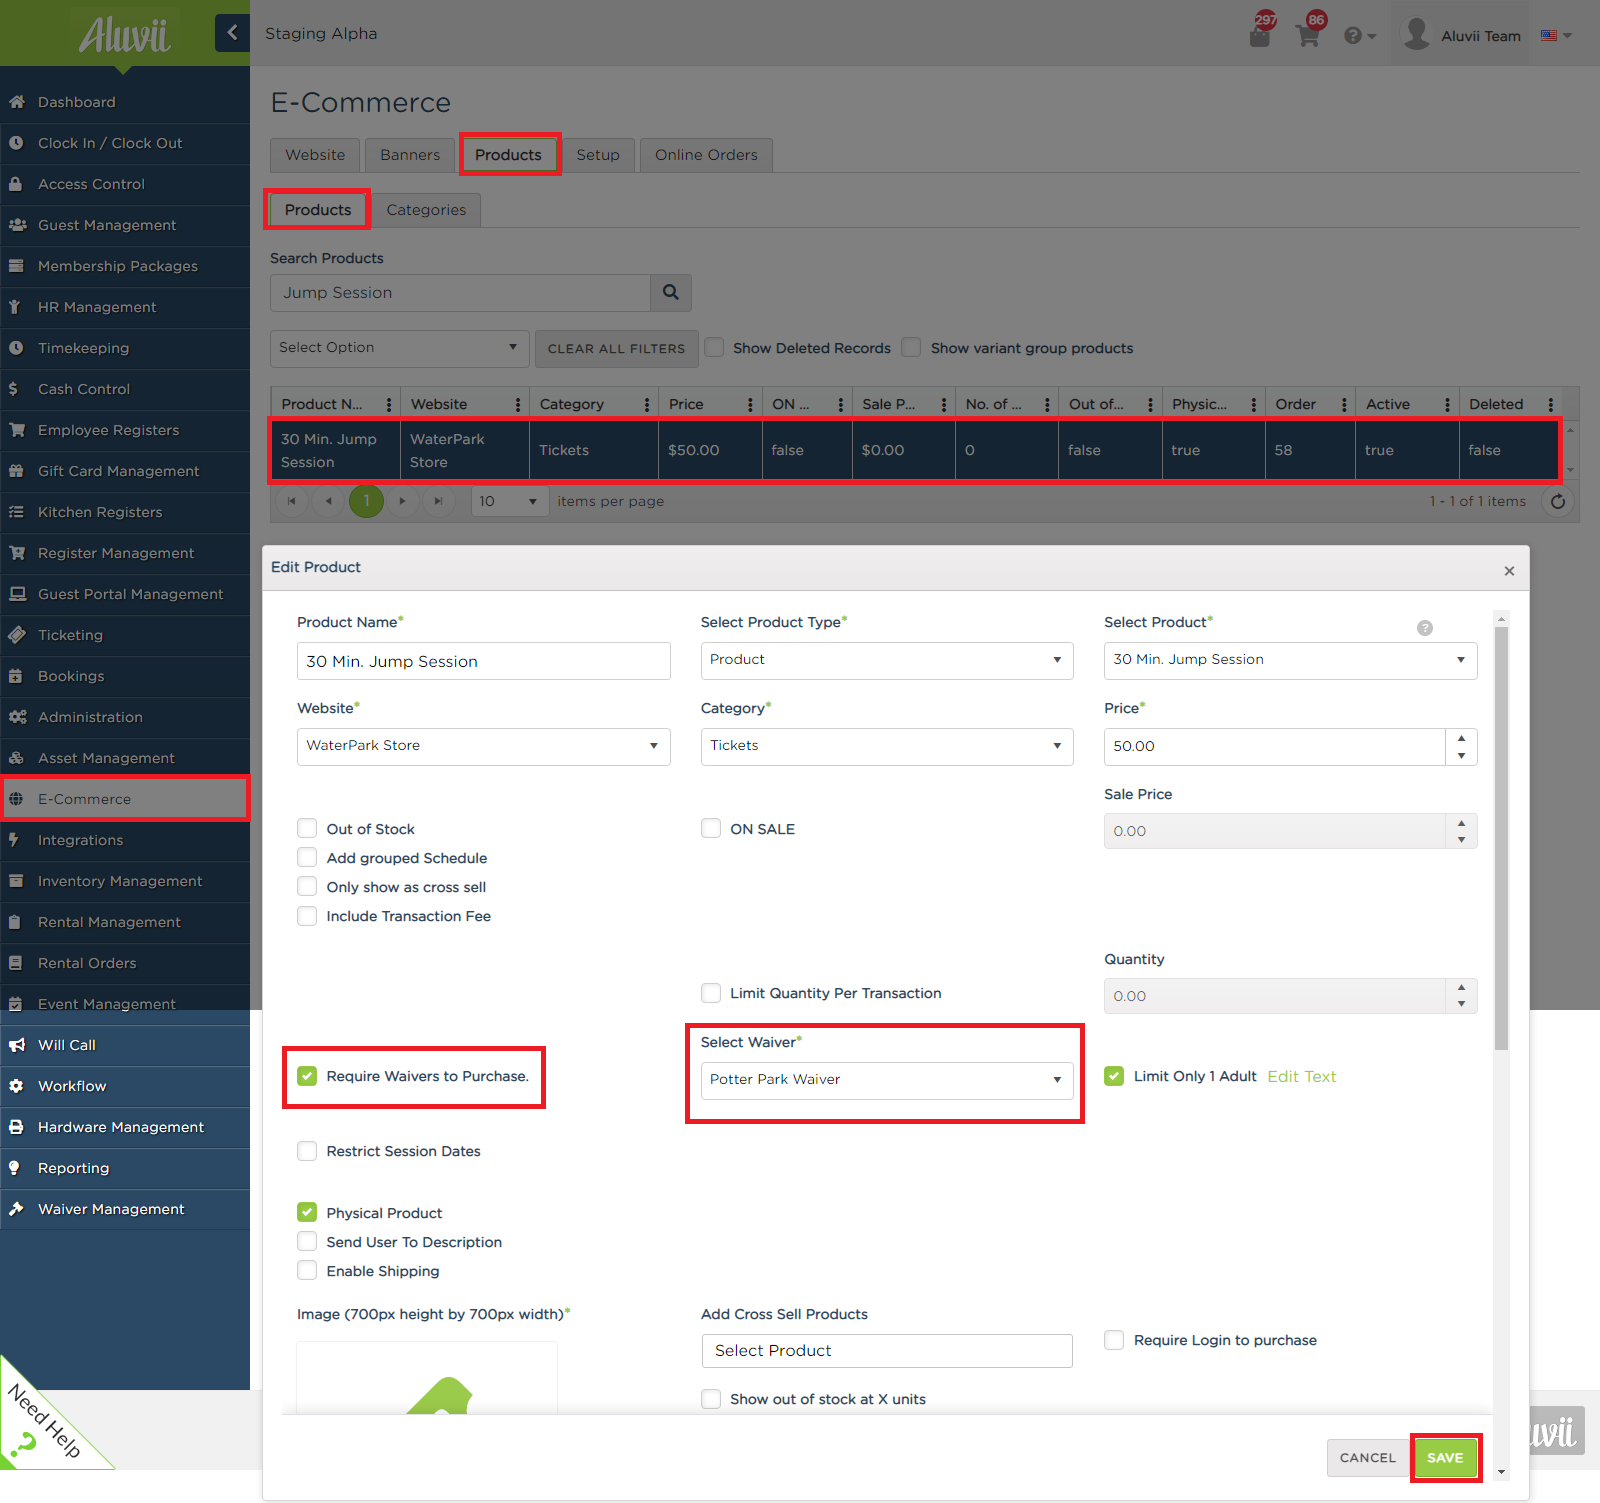 NOTE: Enabling the Limit Only 1 Adult option will not allow two adults on the same signature. So in this case, you can still assign two adults to the sale, but only one adult will be added for that signed waiver. The second adult would need to sign a separate waiver.
 -
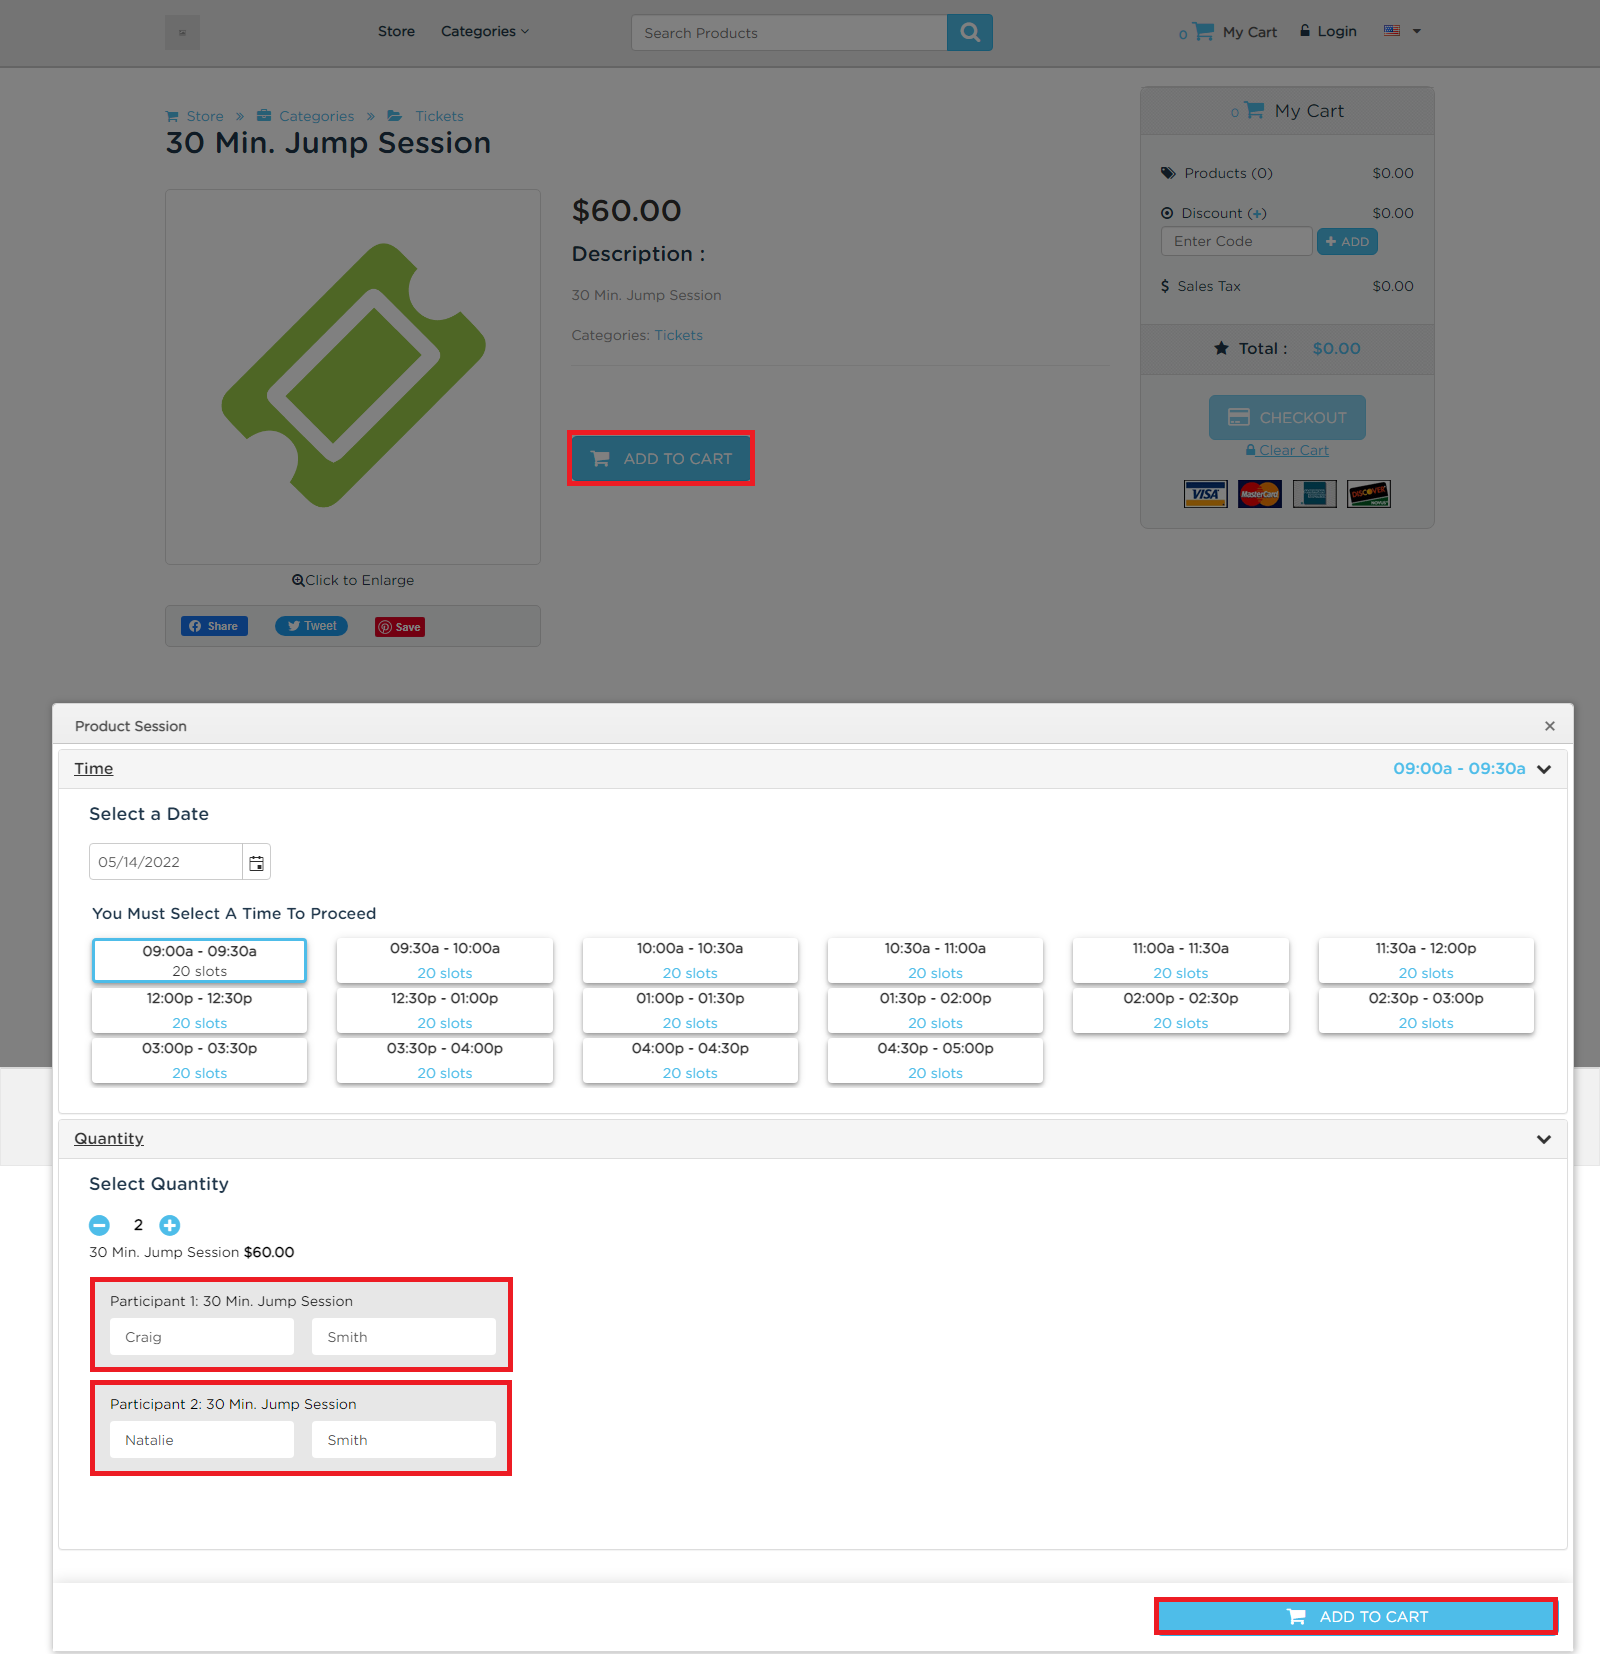
Now, when a customer purchases the product online, he or she can still add multiple guests.
-
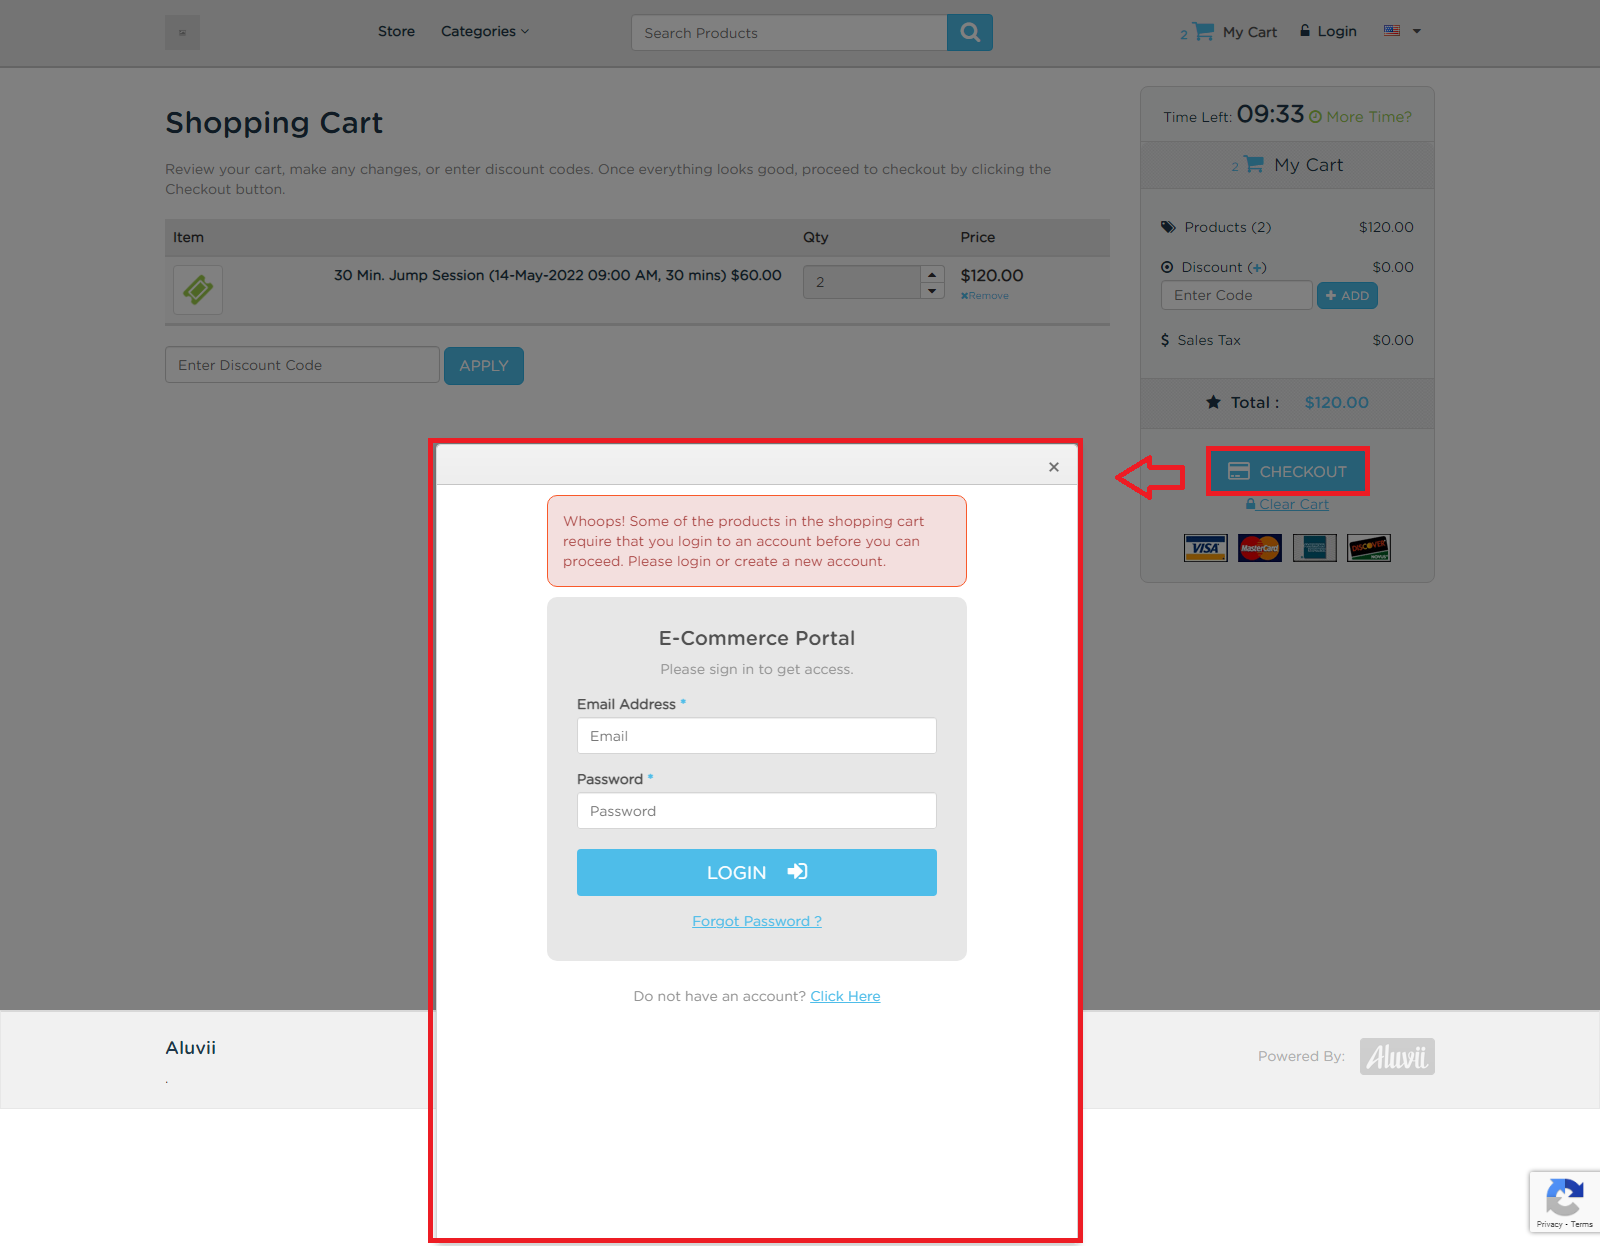
Since the product requires a waiver to be signed, it will require that the customer login to an account so Aluvii can keep track who is signing the waiver. It will prompt the customer to login before proceeding to checkout. If the customer doesn't already have an account, the customer can create one.
-
Once logged in, it will proceed with the checkout process, including the step to sign a waiver. On this step, the customer will be required to add the names of each person on the transaction, and who will be covered under the waiver.
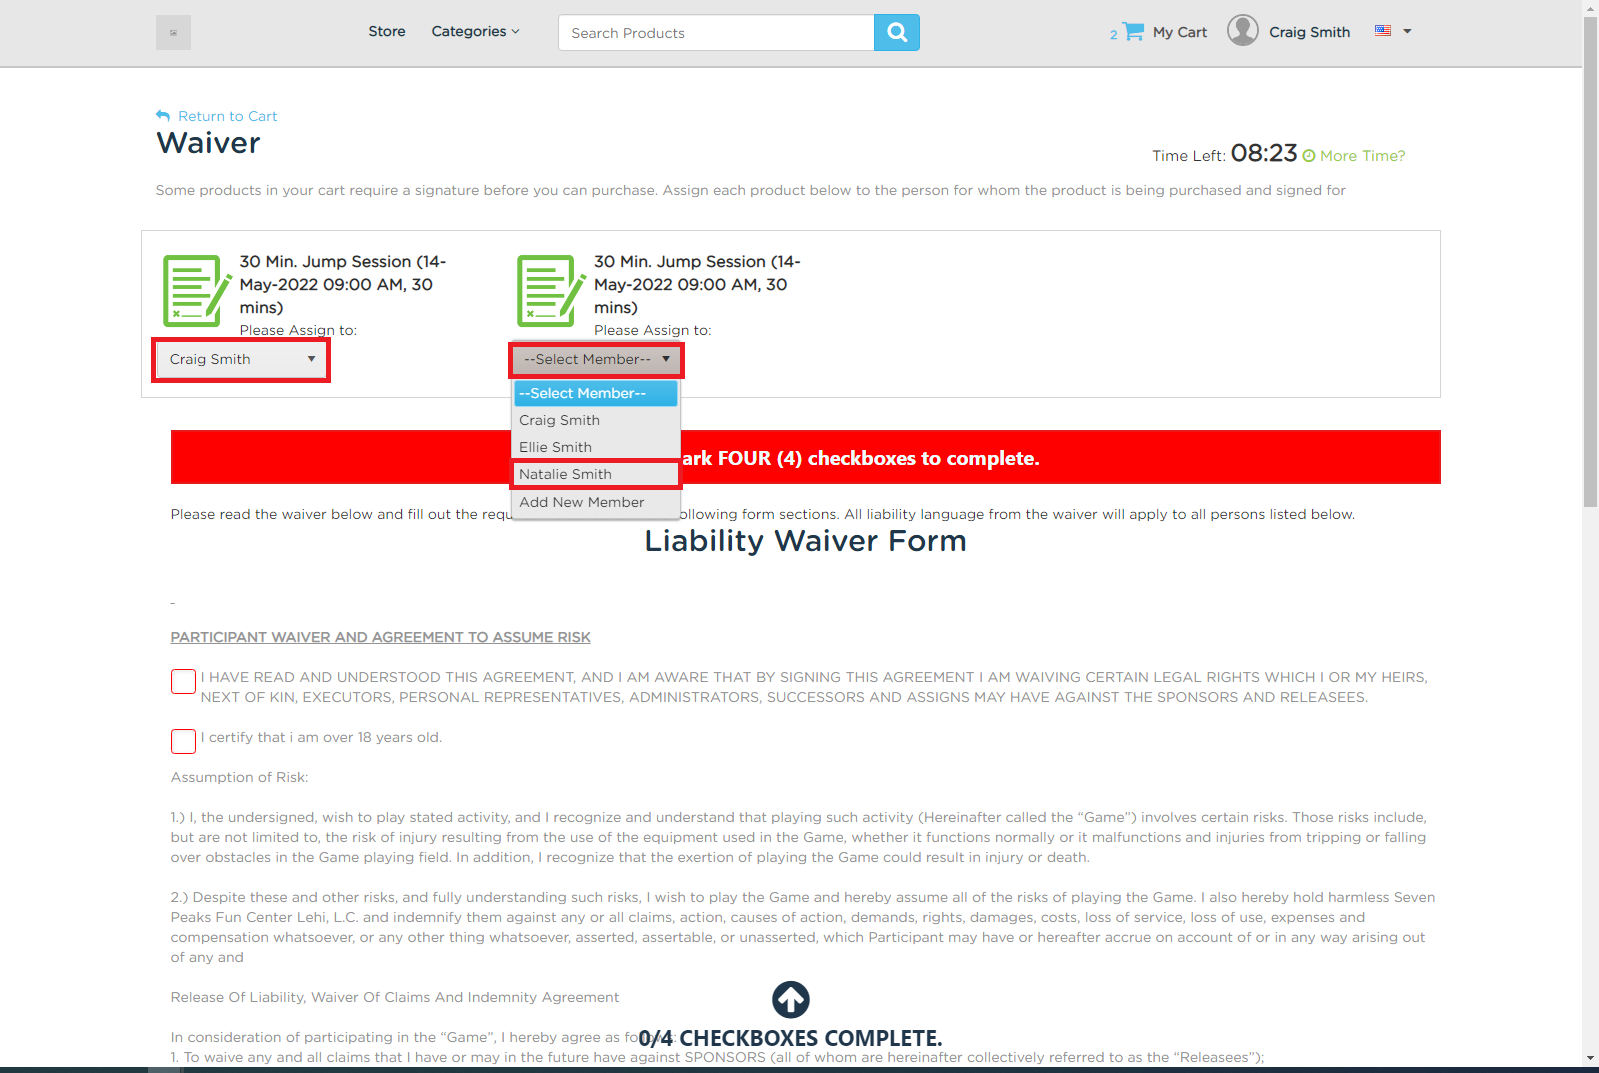
-
If you enable the setting to restrict to 1 adult, upon adding the second adult, a message will prompt the customer explaining that only 1 adult will be counted under this waiver. This message prompt can be customized in the ecommerce product settings. Click on the "I Understand" button to proceed to the next step.
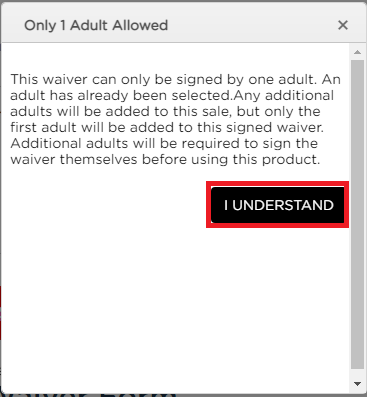
-
After assigning customers at the top, the user will complete the waiver by checking any boxes and signing the form. Then click the Continue Checkout button to proceed to the payment step. Make a payment and complete the sale.
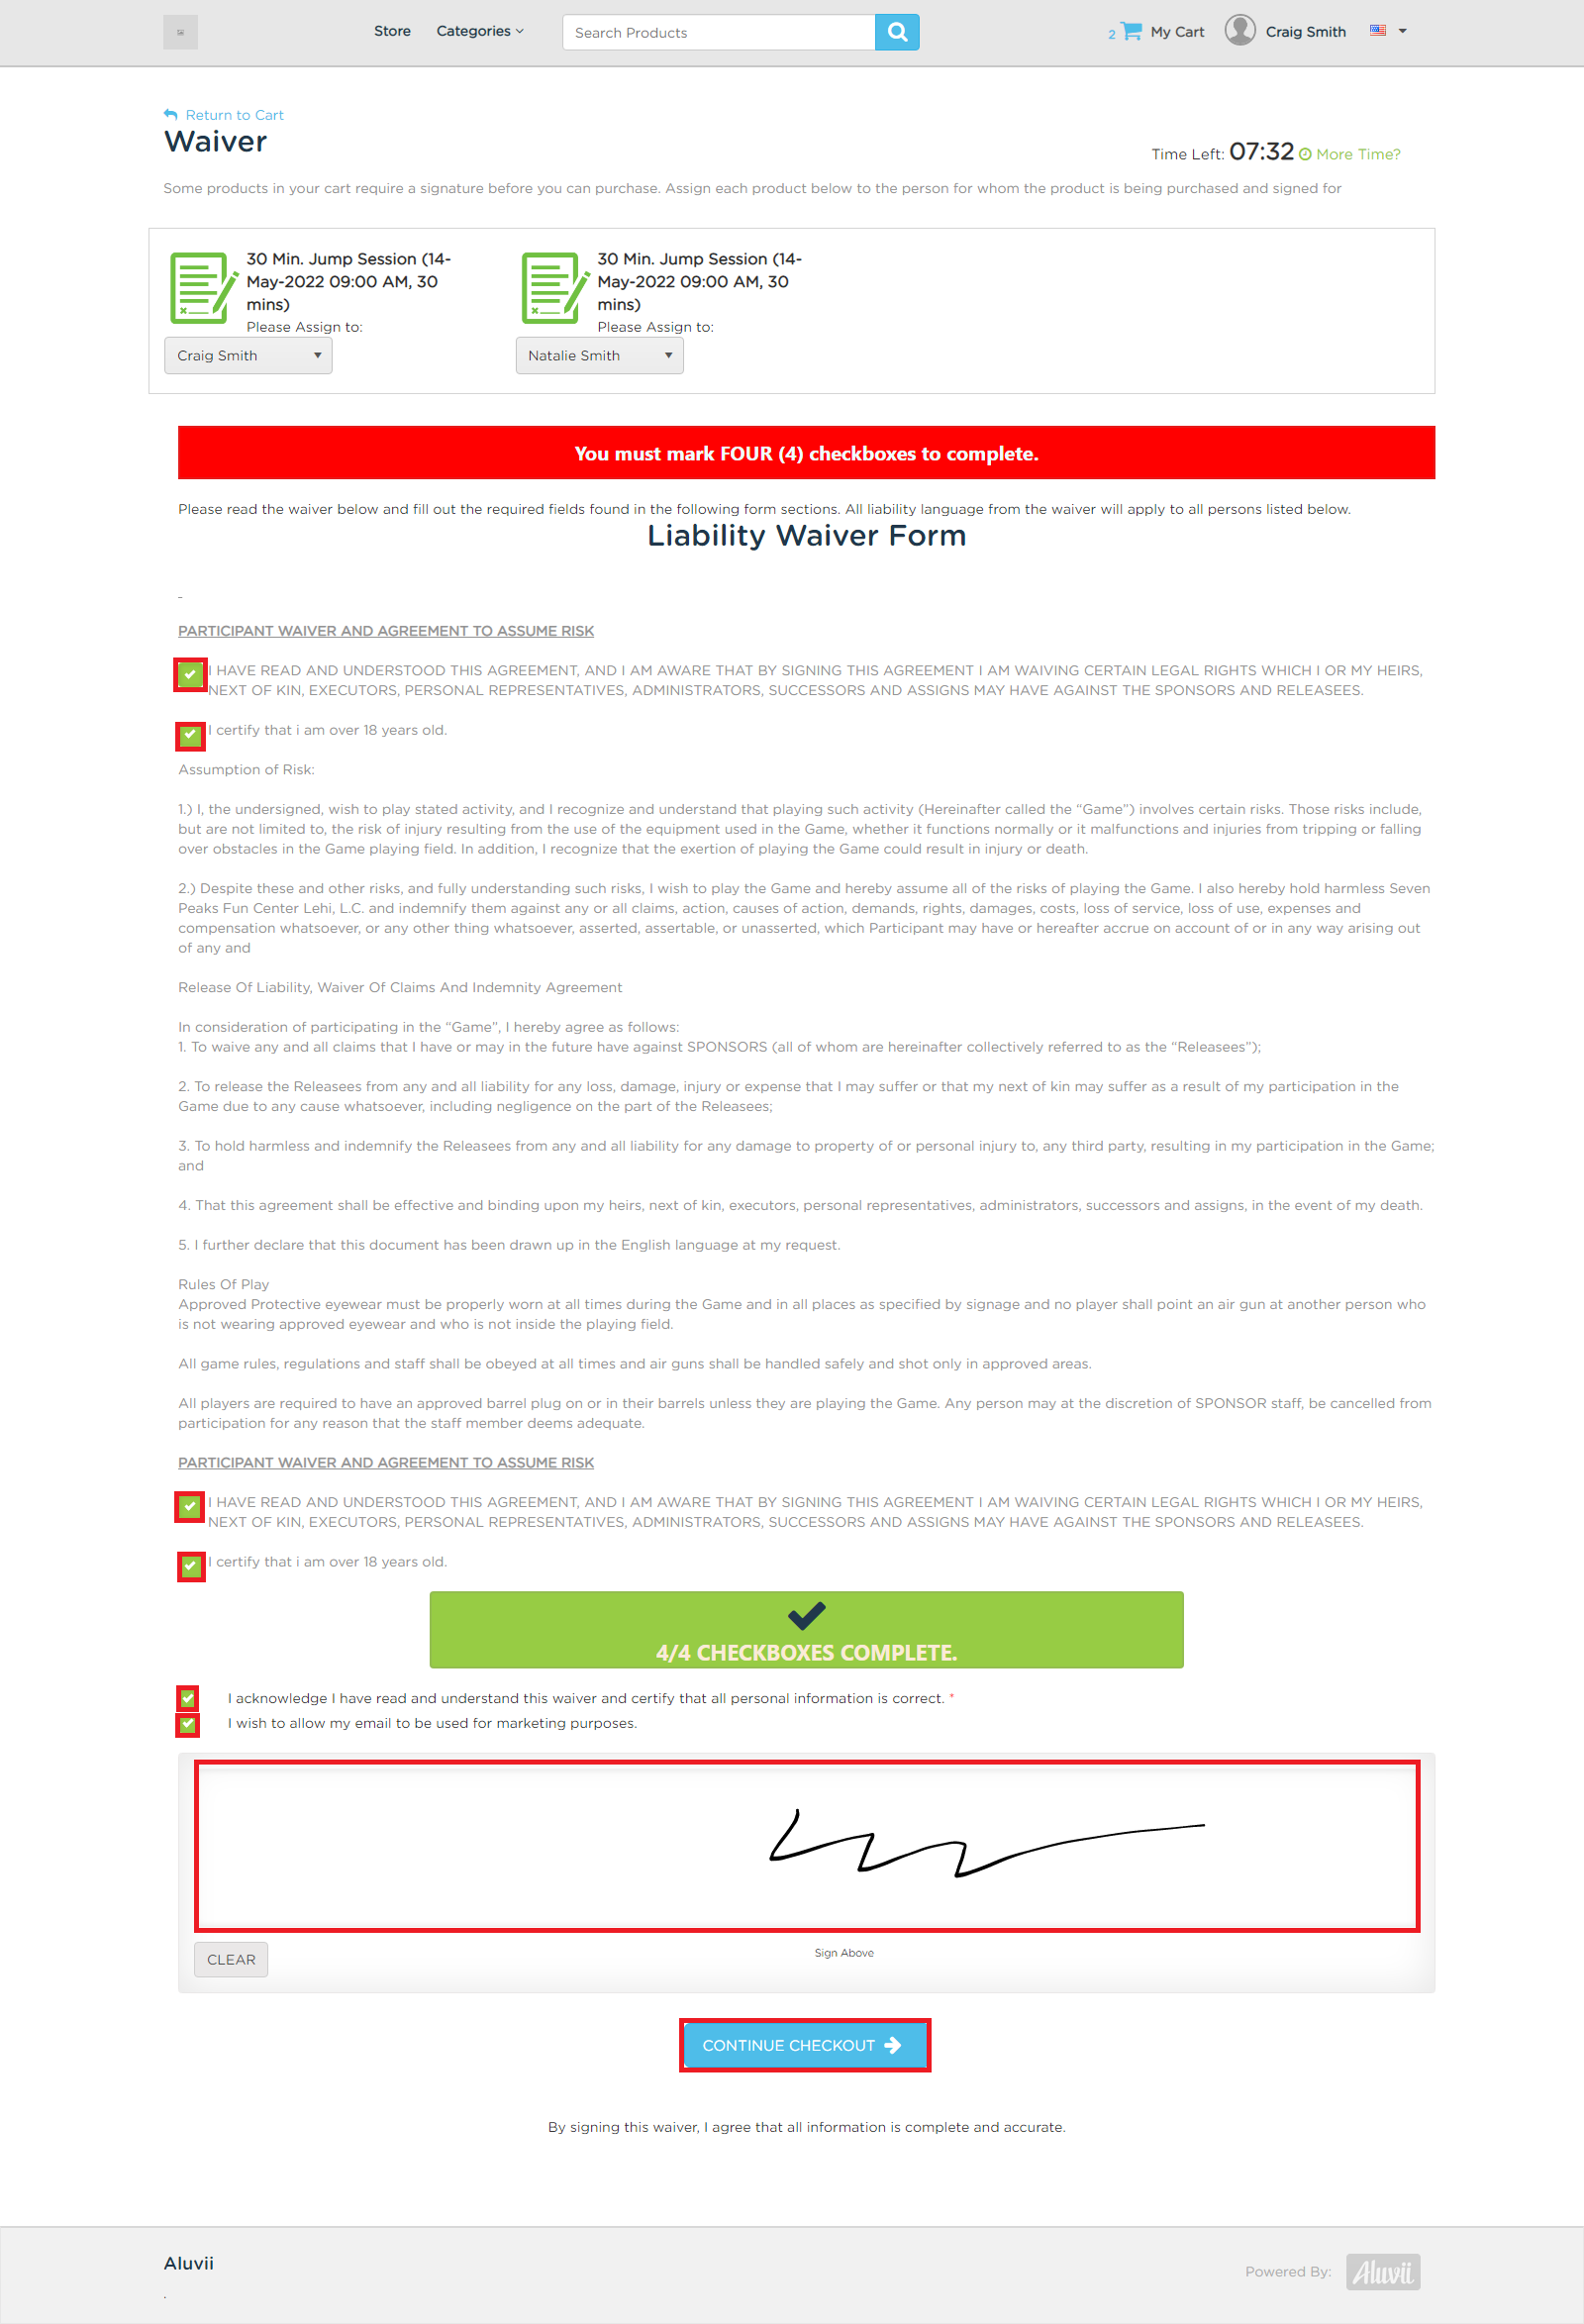
-
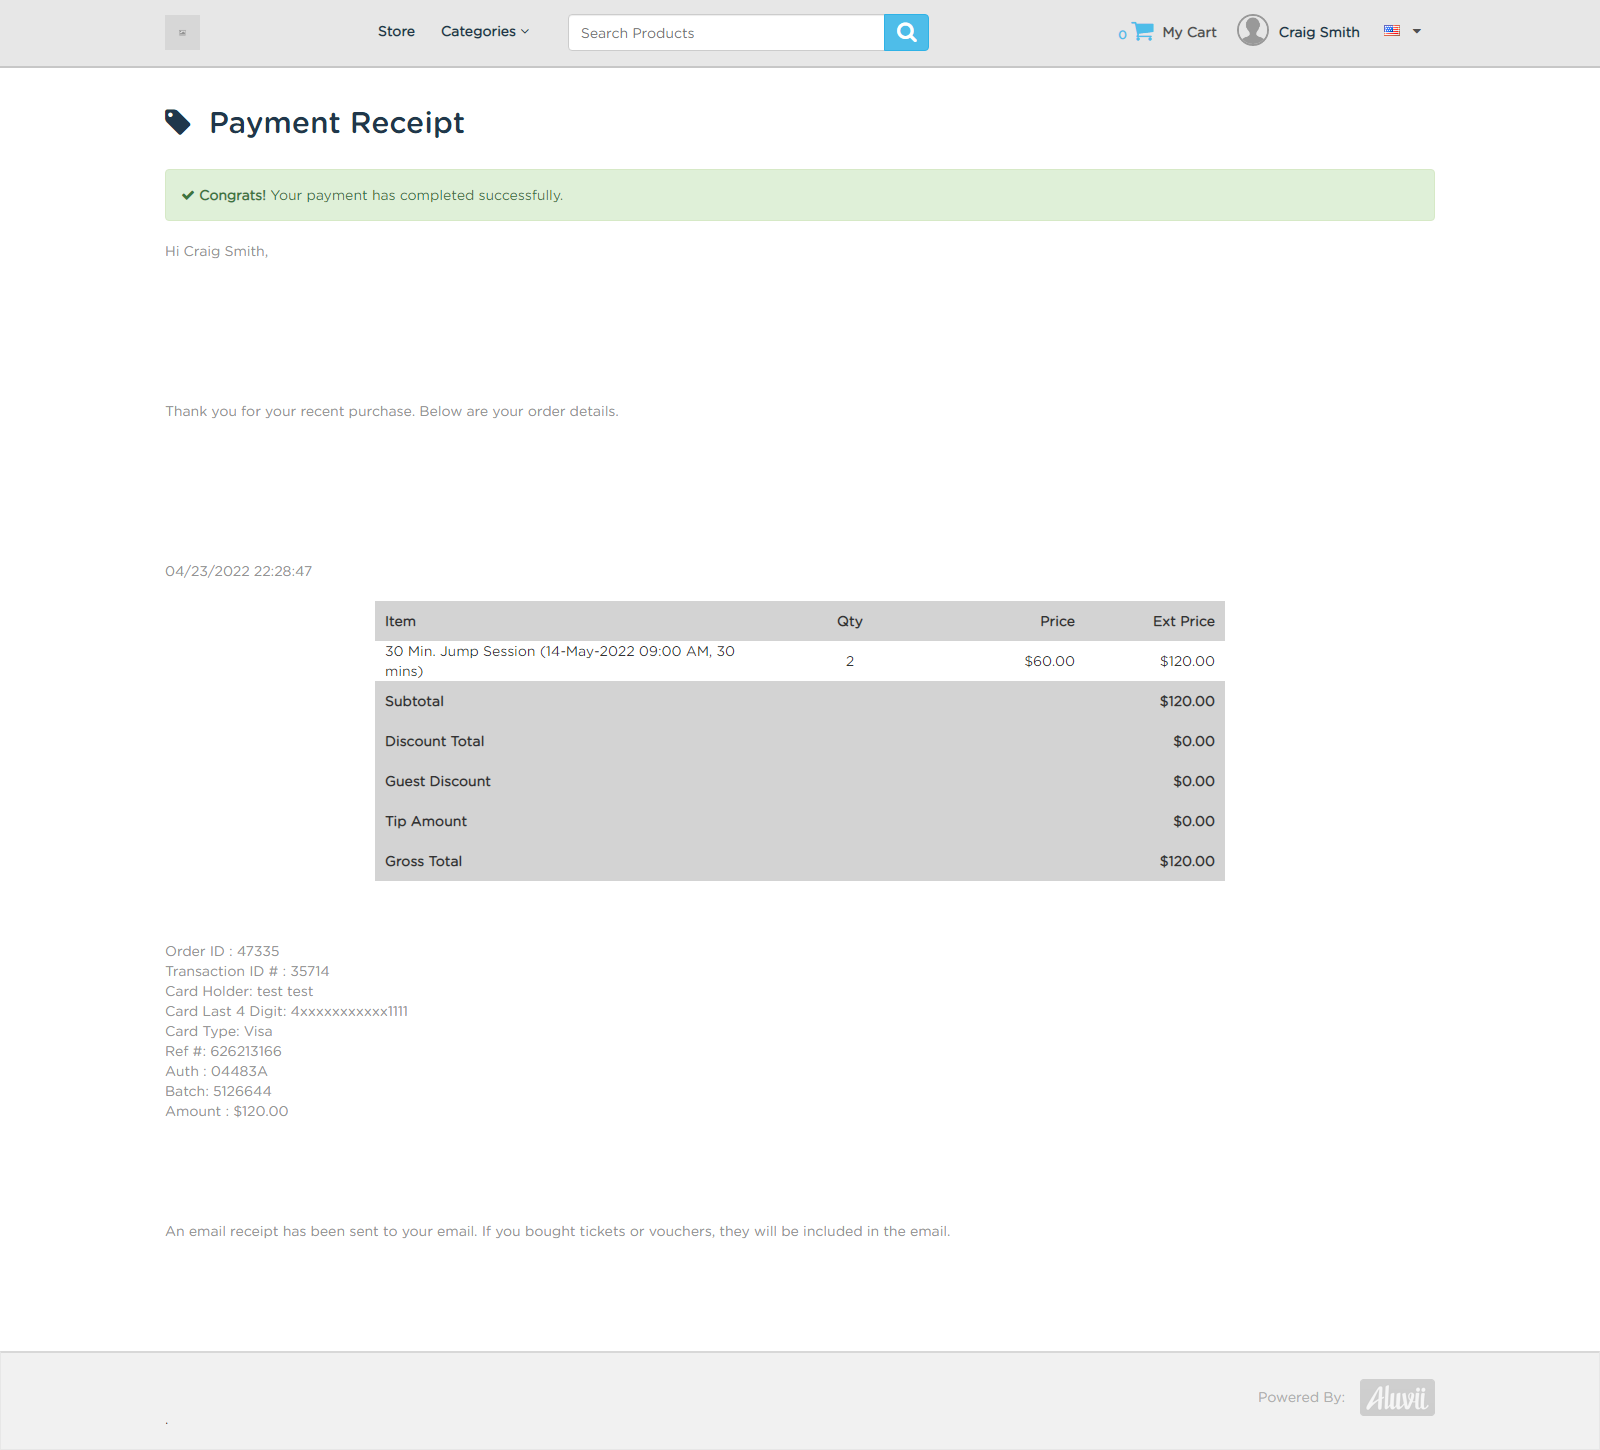
Once paid, the customer will see a confirmation page with the order details, and a digital receipt will be emailed to the customer.
Comments
Please sign in to leave a comment.